Showing posts with label Teeny Tiny Wishes. Show all posts

Sunday, March 5, 2017

Creation Station Blog Hop - Boxes, Baskets and Bags Oh My!


Welcome to Creation Station's March Blog Hop - Boxes, Baskets and Bags Oh My! I'm super excited for this - I Love, Love, Love all the little giftie packaging!! It's so fun to wrap up little treats!

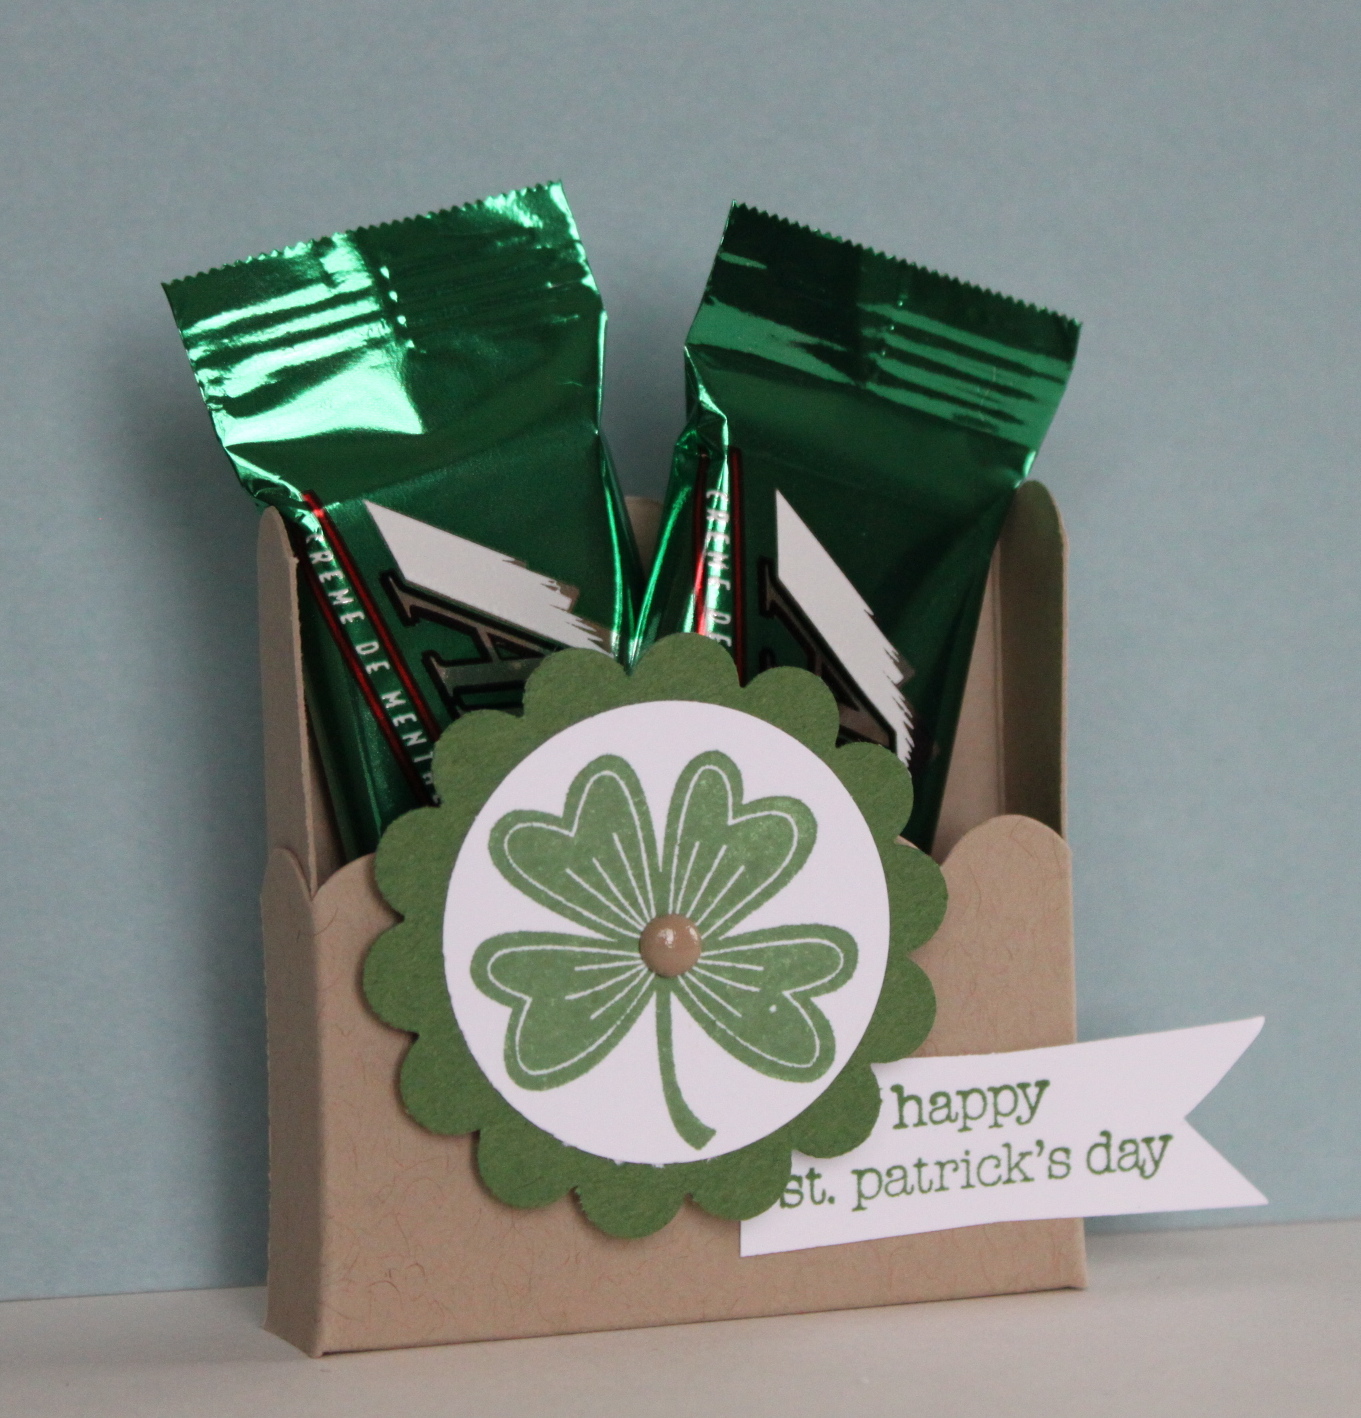
I decided to make something simple for St. Patrick's Day! I know most people don't probably do too much, but wear green for the day, or maybe eat or drink something green... But how fun to leave someone special a little treat?

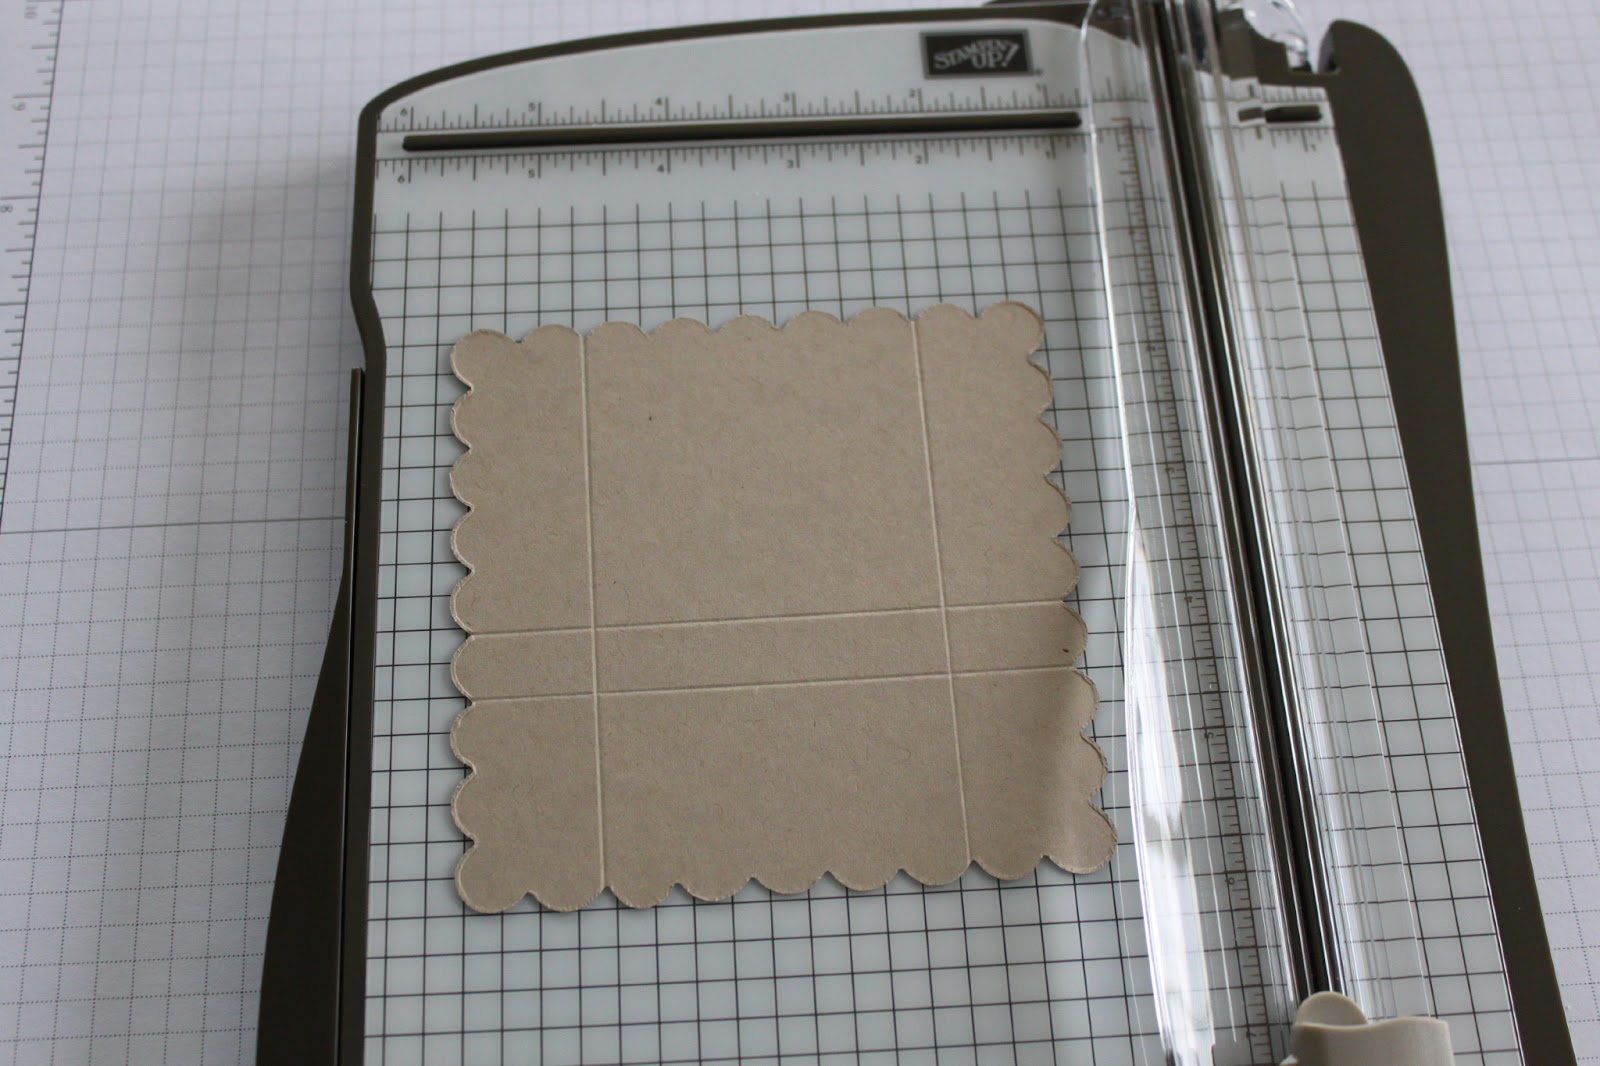
This Baker's Box is the perfect size to package quite a few little goodies. It's about 2" deep and 2-1/2" wide, and sits about 4" tall. - Plenty of room!
   

Stampin' Up! doesn't usually have much for St. Patrick's Day, but there's always a way to create it ;) 
So I used the Party Animal Designer Series Paper for the band around the box - Emerald Envy the perfect color!


The gold medallion piece as well as the hearts (used to make the clover) were thinlits included with the Baker's Box!


I added the Gold Binder Clip with the Emerald Envy Baker's Twine bow for a quick and easy close of the top!

I hope you enjoy the rest of the Blog Hop! Here are the links to either go BACK and see the great work of Cindy Schuster or on to the NEXT with the fabulous Elizabeth Price!!


Thanks for stopping by,

Enjoy,


Julie B

Tuesday, February 28, 2017

St. Patty's Day 'Window Box' Treat for Classes this Week!


This sweet little box is what we'll be making in stamp classes this week! It is made with the Window Box Thinlits Dies. So I just made the basic box - without any 'windows'. The window choices are super fabulous, but for class I just wanted to make the basic box first!

But then I did add my own touches to cutsie up the basic box for a St. Patrick's Day treat! Of course, you can add so many things to it - but probably my favorite part is the new Lace Doilies! - Perfect size for this box and soo pretty!


Everything I added to the box was adhered to a belly band though - so it was easy to remove and open the box :)


Hope to see you at class this week,


Julie B

Friday, February 19, 2016

Some Simple Valentines for a Challenge!


Here's a Valentine card I made last week (and I did actually get them mailed out before Valentine's Day, I'm just posting a little late!). I wanted to make a little stack of quick Valentines cuz I was short on time, so I decided to use the Creating Pretty Cards Sketch Challenge to help with the layout!

And here it is:


It's a great layout that could be used with so many different images and punches!


And here is another one I made with a few extra embellishments (always Love to add a few extras, but not as easy to mail!).

It's not too late to join the Sketch Challenge, just hop on over to Craft Project Central! You might win a FREE tutorial!

Thanks for stopping by,


Julie B 

Thursday, March 7, 2013

Scallop Square Pocket Treat Tutorial!


So here's how to make the little pocket treat, or Scallop Square box that I showed you yesterday.


Start with a Scallop Square die cut. Then score lines between the 3rd and 4th scallops on one side. Turn and score between the 2nd and 3rd on each end of that side (looking at the picture makes more sense on this!). These aren't really measured, you just use the scallops for the guide. 
 

Then cut off the end sections on the '2 scallop end sections.'
 

Then cut in on the middle sections to make flaps that will fold in. And put Sticky Strip on the smaller side sections created.
 

Fold in the little flaps, and adhere the Sticky strip section to the outside edge. The bottom being flat makes this come together pretty neatly! And, yes, that makes it able to stand up like a little box.
 

 Now your little box is ready to decorate and fill!  In my final picture, you don't see the cute scallops on the edges, but you could put something smaller on it to show off how cute that looks!


I added the scallop circle and tag (made from the Modern Label Punch). You can see more details on that in yesterday's post.


Then when I added the Andes mints inside I did add a Stampin' Dimensional on the back of each to keep them from falling out of the treat pocket!

How cute would it be to change these up for any holiday or event? And since they stand up, they would be a cute little place setting favor too!
 
Thanks for stopping by,


Julie B 

Wednesday, March 6, 2013

A St. Pat's Pocket Treat!


I made a bunch of these little pocket treats today! I call them pocket treats, but they're really a kind of pocket/tiny box made from the Scallop Square Bigz die. I hadn't ever made one before, but I have used the die make other little treat holders. - I had forgotten how cool and easy this die makes it to create a little treat holder.

I added the 1-3/4" scallop circle and 1-3/8" circle for St. Patrick's Day. The shamrock is part of the Lucky Day single stamp in the Spring Catalog - it's cool that you can stamp the whole image (with the Lucky saying), and then use the punch to punch out just the shamrock, without getting parts of the word in the circle (you know what I mean?!). 

And, the 'Teeny Tiny' saying was stamped, and punched with the Modern Label punch. Then I clipped and trimmed the edges!

If you want to see how I made the little pocket (box), check back tomorrow cuz I'm going to post a quick tutorial for it!

Thanks for stopping by,


Julie B

Thursday, January 31, 2013

Simple Valentine!


I figured I would get a little ahead of the game, and I made this simple Valentine today! I love the Vintage Wallpaper Embossing Folder - and the new Core'dinations card stock really sets off the pattern! The fancy laser cut heart is from the More Amore Designer Papers - but it's the backside of one of the Primrose Petals ones!

Do you have all your Valentines all ready yet?!


Julie B

Monday, February 27, 2012

A Cute New Little Box!


I found this cute box tutorial made by Jill Hilliard a while back, and I've been waiting to make it! It uses the Petite Pocket Big Shot XL die (which I love!). On its own, the Petite Pocket is a great die cut for a gift card. But, I loved the idea of making it into a box! I just wondered how large it would be, and what would fit inside it.

So I tried it out with some Basic Black Card Stock, and then decided to add some St. Patrick's Day cheer to it! I especially love how the Silver Glimmer Scallop Circle gives it that POP! And I used some 'leftover' hearts from a card I made using the Fashionable Hearts Embosslit.

And after putting it all together, I put about seven Hershey's kisses in it. I also could fit a two-Kit Kat pack into it - the two bars in a wrapper (fun-size?) ones! The box is a fun little cute size!


I think it will make a cute set with the card I showed you yesterday. And I guess I'll be saving it for a special St. Patty's gift for someone :)


Thanks for stopping by,


Julie


Wednesday, February 1, 2012

A Sneak Peek for this Friday's Class!


Here's the little Stand Up Double Pocket that we'll be making at this Friday's Technique Class! I love this idea - I found the idea from another demonstrator, who made this from a 12" x 12" piece of Designer Paper and used it for full sized cards. But, being that I love little things, I changed up the dimensions, and made it to fit 3" x 3" cards and a little treat!


And here's a closer look at the cards that are in the front pocket. They are 3" x 3" note cards, and they have envelopes included with them! Kind of fun for Valentines or birthdays, a little thank you - whatever! The Teeny Tiny Wishes set makes it easy to make them for any occasion. And I LOVE how the smallest of our Framelits look with the Sweet Shop Designer Stickers on these (thanks to Mercedes Weber for the inspiration!).


And here's the back pocket! Of course, I have to put a little sweet treat in it! But it could be used for more little cards or notes! And it's great because this whole little package stands up all cute and on it's own! - What a fun little surprise to leave someone on their desk!

I hope you'll be joining us in making this little project on Friday!


Thanks for stopping by,


Julie

Tuesday, January 24, 2012

A Mixed Bunch with Fun Colors!


Here's a pretty quick card I made with the new Mixed Bunch set. Not my usual colors, but I really like how they go together! I used Basic Gray with Wisteria Wonder and Lucky Limeade. And I like the First Edition Specialty Papers - they just go with everything!


Here's the close up of the flower - Love punches with our coordinating sets!! And notice the scallop edge under the First Edition Papers? It's our new Adorning Accents Edgelit - so cute with all those extra ruffles!


Interested in getting some of the new Occasions Mini products? - well, NOW's the time!! Today is the first day of Sale-A-Bration. FREE products with every order of $50 or more! Check out my website for more details!


Also, be sure to stop by tomorrow - I'll be posting the project I made for Craft Project Central this month - AND you can win a FREE subscription to this month's tutorials!!


See you tomorrow,


Julie

Wednesday, September 7, 2011

My Big Debut and a Giveaway!


If you’re looking for a cute way to give some Halloween treats, this Lidded Pumpkin Box and its’ coordinating card might be it! With the ribbon ‘stem,’ you can either hang the box for a fun décor piece or use it as an easy pull-up handle to hide some special treats.


This is it... my Craft Project Central debut! This is the project I made as a Guest Designer for the month of September. You can get the detailed instructions along with pictures for my project, plus nine other projects for only $10 when you subscribe to Craft Project Central for the month of September 2011. Not only are all the projects super cool, but all the projects are all Stampin' Up!

So how would you like to get a FREE subscription to Craft Project Central this month? You'll receive the tutorials to all ten projects, plus a bonus project this month. All you need to do is leave a comment on this post - and you'll be entered in a random drawing. I'll choose a winner on Friday, September 9th at noon Pacific time.


Thanks for stopping by,


Julie


Sunday, August 21, 2011

Farewell to the Open Sea!


I made this card today for my husband for his birthday. I used the set Open Sea, which will soon be gone! It's in the Summer Mini Catalog that ends on August 31st. I think it's a great 'must-have' set for masculine cards! And it has the awesome 'Nautical Expedition' Designer Papers that coordinate with it.


But one of my favorite things that I figured out while making this card was that Watercolor Paper is a MUST for watercoloring! I've watercolored plenty of images, and I've always tried to skimp and use our (awesome) Whisper White or Very Vanilla cardstocks (which they are THE BEST for stamping clean images). I guess I was being kind of cheap to not buy the Watercolor paper. But, man is it worth it!!

I'm definitely a student of watercoloring - meaning I'm no expert. But seriously, the Watercolor Paper makes it so much nicer! Put a little or a lot of color on your image, and the paper lets you move the color around. You can add more water to lighten it, or add more color to darken it. You can even add different colors on top of each other. It's very forgiving - you just gotta have some on hand!!


Thanks for stopping by,


Julie


Monday, May 23, 2011

Graduation Owl!


I needed a graduation card, and I couldn't resist making one of these little owls! I know I've seen a lot of these little guys made, but I was inspired by a card made by LeeAnn Greff (I've followed her blog for a long time!). You can check out her version here. It's pretty much the same, but I made bigger eyes and I used Pacific Point.


I also gave an extra black layer and popped up some parts for extra dimension. And I used the Black Taffeta ribbon - I love the weight of it, and it's so easy to push and pull into place!


Here's a little bit closer up of the owl - he is pretty cute, huh?! His little diploma is just a piece of 1 1/4" x 1 1/2" typing paper rolled up and tied with the 1/8" Black Taffeta. His wings were made with a Scallop Oval punch, just with the top part of it trimmed off. His graduation cap is hand cut out - but the rounded edge that sits on his head was made with the 1 1/4" circle punch.


And here's the inside, with the saying from the Word Play set. - Perfect for the graduate, don't cha think? And, guess what? - the set is still on sale for 30% off, but only until the end of May! (You can click on the "National Scrapbooking Month" ad to the right for more details.)


Thanks for stopping by,


Julie

Wednesday, May 18, 2011

A Blushing Floret!


Today I finally got a chance to play along with the Stamping 411 Sketch Challenge. I decided to use the Fabulous Florets set (from the Summer Mini). And I used Blushing Bride, Crumb Cake and Soft Suede.


And here's the sketch!


Here's a closer up of the flower - I stamped it onto Very Vanilla and then yep, I cut it out! Then I popped it up with a couple Dimensionals. And the background Scallop Square comes from the Big Shot die Scallop Squares Duo (also in the Summer Mini!).


And here's a close-up of the saying and the brad accents. The saying comes from the Teeny Tiny Wishes set (man, I've gotten my money's worth out of that set!!). And the brads are from the Subtles collection - really they're Pretty in Pink, but they go great with the Blushing Bride Patterned papers!


Thanks for stopping by,


Julie