Wednesday, December 30, 2009

Christmas came and went!!


I hope you had a wonderful Christmas! It sure comes and goes quicker every year!! So, here is the Christmas card I made this year. I used Dasher - gotta love him! - and the Grateful Greetings set from the Holiday Mini catalog. I also used the Snowflake print window sheets along the bottom from the Holiday Mini Catalog. By the way, the Holiday Mini Catalog is ending on January 4th. And we have some great new stuff coming out after that! One is the punch along the edge of this card - it's a FREEBIE that you can earn in the Sale-A-Bration sale htat starts January 5th! I love the delicacy of the new punch, and it goes with a lot!


Also, I used Bordering Blue, Soft Suede and Kraft cardstocks for the card. I love these colors together. You can't tell from the picture, but I also sprayed the card and Dasher with Shimmer spray. In real life it gives a nice added touch! And, by the way, the Shimmer Paints were so popular that Stampin' Up! is continuimg them through the next Ocassions Mini Catalog period! So you can keep on ordering them - They'll make for some beautiful Shimmery Valentines!!


Hope you are enjoying the holidays, and thanks for stopping by,


Julie

Monday, December 14, 2009

Happy Birthday a little late!


Well, I did finally get my Christmas card decided on - and I've been working madly on all the steps to factory-line produce and assemble them. I do really love the process of it all - just the hardest part is making the decision that "this is it!" It seems there's always that "maybe I could do... or maybe I should add.." But there always comes that point where you need to just be happy with it. You set it down, come back to it in a bit, and look again - and then "yep, I like it!" Anyway, I'll post it soon...


But I have posted a card I made for my nephew, whose birthday was in November. And, yes, I finally mailed the card a week ago - more than a week late!! You know how these things are NOT a surprise, but somehow they creep up on you and then pass you by?! Anyway, late, but not forgotten!!


So the card is made with a Kraft base, and I used the new Polka dot Impressions folder (available in January!). Then, with the Thoroughly Modern Designer Series Papers I layered Bermuda Bay, Soft Suede, Kraft and White layers. I used the Good ol' Holiday Blitz set for the present and the Birthday Greetings set. I often go back to this layout for cards because I like the clean look to it!


Thanks for stopping by!


Julie


Tuesday, December 8, 2009

Christmas and a Sneak Peek!


So, here I am still figuring out what my Christmas cards will be this year!!? I put together lots of designs for classes and see a lot of great ideas online, but I always have to make mine a little bit different. So I'm always tweaking things around till the last minute (and past!!). Since I bought some of the new Occasions sets that will be released in January, I was looking online at what others were doing with their sets, and I found a similar idea with the new I {Heart} Hearts set. I liked how the heart was used with love, but then ADDING Christmas to it. Anyway, not sure I'll remake this one for a big bunch, but I do think it's pretty cute.


Here are the details - the holly is from the Christmas Classics set; it's stamped out twice and cut out separately, olive and red. Both of the hearts are from the I {Heart} Hearts set. And, the little one is punched out with one of the new punches! The "Christmas" word comes from the Fundamental Phrases set, and is punched out with the Word Window punch. There are lots of layers, but one of my new favorite things is on the base of the card - it's a new Embossing Folder!! It's called Perfect Polka Dots - and they're perfect alright! Love them!


There are a few more steps and punches, but you could probably figure them out - I think this won't be my Christmas card this year, only because it will be too time-consuming to re-create for bunches of them, but I still like it.


Can't wait to share more details of what's coming in January, but for now I better keep focus on Christmas card completion!!


Thanks for stopping by,


Julie


Wednesday, December 2, 2009

Sneak Peek for Friday's Class!


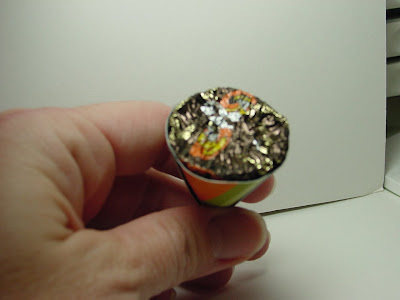
So here's a little Sneak Peek for one of the projects we're making this Friday at Technique Class. It's a little Cocoa Cup (or tea cup, or coffee cup, or whatever kinda cup you want it to be!). I saw a template on the Stampin' Up! website a while back - and realized Nah! Don't want to download, photocopy, trace, cut out and score the pattern. Way too much work for me!! Then, I finally looked a little closer and realized it would be an easy one to create with just a few score lines on the Fiskars cutter! So, here it is... and on Friday you'll be making one (with all the little goodies inside!), and you'll see how easy it is! (Otherwise, I may post the directions later.)


Off to get the other cards ready for Friday.


Hope to see you then~


Happy Stampin'


Julie

Thursday, November 26, 2009

Happy Thanksgiving!


Wow! This picture definitely came out different than it looks in real life! But with about 15 minutes left of Thanksgiving, I'd thought I'd pass a long a Happy Thanksgiving to you!! These were little matchboxes, punched out from the Big Shot in Chocolate Chhip and the Autumn papers from the Holiday Mini. Then I stamped the saying from the Grateful Greetings set, also from the Holiday Mini, punched them with the large oval and then a Chocolate CHip Scalloped Oval to layer it on, tied with a chocolate chip Grosgrain ribbon - and wahlah! Oh ya, the most important part was the nuggets wrapped inside; you can see them peeking out of one of the boxes!


The best part of these was that my 2 1/2 year old nephew used almost all 15 of them to make a race track and then a garage for his hot wheels all across the dinner table! The memories of Thanksgiving and family....
Hope you had a wonderful Thanksgiving!
Julie

Sunday, November 22, 2009

Cute Little Rudolf!

I've seen so many cute little things made with the Stampin' Up! punches lately - and I'm lovin' them A Lot! I used some Big Shot parts for this one along with punches. From the versions of "Rudolphs" I've seen, there are a few different dies/punches for the antlers. But I had the Swirls Scribbles Sizzlet die that seemed to fit just right for the antlers. Then for his head is the Wide Oval punch; his "bangs" are a piece of the largest flower of the Boho Blossoms punch; his eyes are 1/4" circles and his nose is a 1/2" circle.


The white gel pen was used for highlighting his eyes and nose. I put him on a Top Note Chipboard piece that I had sitting on my desk since forever!! (I had bought the chipboard and wanted to try it in the Big Shot, but then never had a reason to use it for anything.) On the Top Note I stamped white Snowflakes, from the Holiday Blitz set, sprayed with Shimmer, and Sponged with Chocolate Chip ink. Then I added the Merry Christmas saying from the Teeny Tiny Wishes set on a Word Window Punch and a Modern Label Punch - Love those Punches!!


I hope to make some more tags that I will actually use this year - seems like there are never enough when you are finally ready to wrap all the gifts!


Thanks for stopping by,


Julie


Friday, November 20, 2009

Funny Little Punch out Turkey!


I found this cute little turkey nugget made out of punches, so I decided to make one. Probably my camera, or maybe it was just that second glass of wine I had, but he really does look better in person! His body starts out with a nugget candy wrapped in Designer Series Paper. Then attached to his back half are three scallop circles (trimmed between Feathers, or scallops) to make his tail feathers.


Then his front half is a 1 3/8" circle for the body, a 3/4" circle for the head, one scallop from a scallop circle for his beak, a "graduated scallop circle piece for his "gobbler", and two prongs of a Snowflake for his feet. Then his eyes are are just drawn with a black marker.


I think they'll make a cute little place setting for the Thanksgiving table!


Have a great weekend,


Julie

Thursday, November 12, 2009

Christmas is Coming!!

Next Friday, November 20th at either 10am or 6pm, I'm having a Christmas Card-Making class. We'll be making cards in sets of 4's, and the minimum number of cards to make is 20! So we'll be making a stack!! But I'm trying it this way this year to offer a little more choice - so, if you want to make 20 of all one style you can, or you can make any groupings of 4's of whichever ones you want - 8 of one, 12 of another, or whatever... So, for 20 cards it is the Holiday Gift price of $25!! And, if you'd like to make more than that, it is $5 for each additional group of 4. The price also includes envelopes - You just need to show up, and I'll have everything cut and ready to go for you!


So, here are the card choices I'm offering:


If you're interested in coming over and stamping Christmas cards, drop me an email and let me know your choices. I'm asking for RSVP's by tomorrow, Friday the 13th, so that I will have enough time to order and prep everything.


If you're interested in making cards, but can't make the date, I can make your kit a "Take Home Kit," and you can make the cards whenever you have time! Just drop me an email and we can figure out the specifics.


Thanks for dropping by,


And Happy Stamping!


Julie


Monday, November 9, 2009

Thankful For my Big Shot!


I decided to make a Thankful Banner for my fireplace mantle for Thanksgiving. And, yes, I was thankful for my Big Shot!! I used the Pennant Die and the Serif Letter Dies - and Wow! Thankful has eight letters! Doesn't seem like a lot, but it feels like a lot of turns of the Big Shot handle when you want some nice layers! But, no complaining here, I wouldn't be making a banner without the Big Shot!


Here's a close-up of the "A" just to see some of the detail. I used the scrap edges of the second layers to trim and make scallop edges under the Designer Series Paper accent pieces. By the way, the Designer Series Paper is the Autumn Meadows from the Holiday Mini Catalog. Once again, the Designer Series Papers helped me coordinate all the colors! And, I did add some Champagne Mist Shimmer Paint - sprayed on! - although the picture doesn't really show it.


Hope you have a good week!


Thanks for stopping by,


Julie


Tuesday, November 3, 2009

Another Shimmery Fall Card!


I saw this card, a bit different, on Andrea Walford's blog, and decided to CASE it! I think the message, from the stamp set Hope Happens, hits home!! I haven't been real excited about the Autumn Meadows Designer Series Papers, but I guess now that it's been feeling a little more like Fall - and Halloween is over - I'm kinda liking these papers more.


I made the card 5 1/2" square. And, I used layers of Chocolate Chip, Really Rust and Ivory Naturals Cardstocks. The leaves are made from the Big Shot die Leaves 2, and are Chocolate Chip, Really Rust and More Mustard. I also added a Chocolate Chip Corduroy Button with some Linen thread.


Here's a close-up of the base of the card in Chocolate Chip, and it's sprayed with my new Favorite technique Spray-On Shimmer! I used the Champagne Mist Shimmer Paint for this one. I liked how the tones of the Champagne color went better with the browns of the card. I think you definitely see it better in real life!


Here'e one of the leaves up close too. Also notice the "veins" of the leaf? I did that by just setting the leaf on the spongy mat that comes in the Mat pack and drawing them with a stylus tool - kinda fun detail!


Hope you are having a good week so far! I hope you'll be at the Technique Class this Friday; I can't wait to show you all how to "Shimmer!!""


Thanks for stopping by,


Julie


Friday, October 30, 2009

Pumpkin for any Occasion


Wow, I don't where the last week, or so!?, has gone!! Anyway, I'm back! I've been doing lots of stamping - just haven't been on the computer to share - sorry! I'll catch up though. I have some cool class ideas that I'll be showing you soon too!


So, this card is the easy-to-make pumpkin, using three wide oval punches. I used the leaf from the Autumn Days set - lovin' that set! The Give Thanks stamp is from the Holiday Best Hostess set. My favorite part of the card is the background that's all "shimmery!" It's a new technique that we'll be doing at the next class - on Friday, November 6th.


I tried to take a close-up picture here to show the shimmery look - it's done with the Shimmer Paint in the Holiday Mini catalog. I'm totally addicted to this new shimmery look - It makes me think of our Shimmery White Cardstock, but you can do it on anything!!


You'll have to come on Friday and see how to make it!!


Have a Happy Halloween!


Happy Stamping,


Julie


Monday, October 19, 2009

Halloween Criss Cross Box


I made another quick Halloween treat this morning. Remember our good old pattern the Criss Cross Box (check your technique ring!)? This is it with a Halloween twist! I used the Cast-A-Spell designer series papers and the set Grateful Greetings from the Holiday Mini Catalog. I also used the small and large tag punches. And, for the "Goblin Greetings" tag, I used the Wide Oval punch and two overlapped Scalloped Circle Punches behind it (remember that trick too?!).


Hope you have a good Monday!


Julie


Thursday, October 15, 2009

Ornament Acorns!


Here's another way to use the Ornament Punch that's from the Holiday Mini Catalog. Not that the original, with it's coordinating stamp set, isn't already totally cool and awesome! But, here's how to make the ornament into an acorn. I used Kraft and Chocolate Chip cardstocks along with Chocolate Chip Designer Series Patterned Paper. I also used the Grateful Greetings Stamp Set from the Holiday Mini - LOVE the sayings, and especially the fonts! So now your ornments can be used for Fall and Thanksgiving!


Oh, and I did use other punches - the Scalloped Edge for the acorn "cap," the Large Oval and Scalloped Oval for the saying, and the Five Petal Flower for the leaves (I think I use that punch for leaves more than I do for flowers - but it also makes a cool pointsettia for Christmas!)


Thanks for stopping by,


Julie

Monday, October 12, 2009

Ornament Punch Versatility


This is one of the cards we made at our last Technique Class. We did "Foil Paper Resist." Using the Bride Specialty Paper, we brayered Old Olive ink over it and the scroll design resisted the ink leaving it white! Pretty cool, and you can do this with any Classic Ink Color to make a super cool background. Also, the Bride Paper has a striped paper that you can do this on too!


But, what I really wanted to show you was the Ornament! Notice the ornament is perfectly "cut out;" Well, it's not really cut out, it's the Ornament Punch! And, I saw some cool ideas with the punch that I thought I'd share...


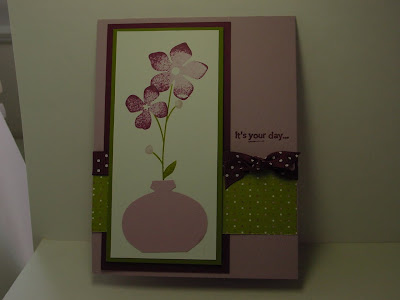
I made this card (sorry the picture is so dark!) using the Ornament Punch, but just trimming off the bottom edge. So, it creates a little vase for flowers! The sets I used for the card are For All You Do and Birthday Greetings. And I used papers from the Cottage Wall Designer Series Papers.


I have another versatile idea for the Ornament Punch, but I'll save it for another day!!


Have a Happy Monday,


Julie


Wednesday, October 7, 2009

The Very Versatile Pumpkin Patch Set!


So, remember a while back I posted this card with the Holiday Mini set, Pumpkin Patch? Well, on Jill Hilliard's blog (she's a great stamper!), I saw how she showed the versatility of this set! And, of course, I decided to copy with a few of my own tweaks in colors and layout, so I could share the idea with you!


So, here's the set using the "pumpkins" as Christmas ornaments, and all glittered up (probably hard to see from the picture). Then I added the Merry Christmas from the Teeny Tiny Wishes set.


And this next one uses the "pumpkins" as birthday balloons. Also, the curly ribbon on the bottom of the balloons is the curly "twig" from the set, but the strings were just drawn in. And, again, I used the Teeny Tiny Wishes set for the happy birthday saying.


And, finally the "pumpkins" are now turned into flower centers! With circle punches and some hand trimmed stems, they became flowers. The leaves were made from the Five petal flower punch (which is on the Deal of the Week until Monday morning!). And, of course, the Teeny Tiny Wishes set once again!


At first I wasn't sure about ordering this "Halloween" set from the Mini Catalog, but now I'm super glad I did! What a versatile set it turns out to be!!


Thanks for stopping by,


Julie


Monday, October 5, 2009

How Cute is Candy Corn?!


Today I was checking out some blogs as usual (I know you must think I'm always just checking out other people's blogs - but I do once in a while stop to CASE their creations!) Anyway, this little cutie came from a lady who's my sideline (we're both under the same upline - Tami Waddell), named Pennie McCallum. She's an awesome stamper!


It's our good ol' Triangle Box Pattern (if you've been coming toTechnique Class for a while you should have this on your ring). You take a 3" x 6" piece of cardstock and find the center on all four sides. On the 6" side just create a score line and fold in half. But on the 3" sides, find the center and then connect it with the center of the 6" side (creating a triangle on each half). Then fold in the score lines and "smoosh" it all together to make a triangle box. Clear as mud?! If you need help, email me at julieb30@hotmail.com.


Here's the other big difference though. Instead of using just a 3" x 6" piece of Whisper White cardstock, layer pieces to make it look like the colors of Candy Corn. Use two 1" x 3" pieces of Yo Yo Yellow and one 2" x 3" piece of Only Orange cardstock. Layer them onto the 3" x 6" piece of Whisper White Cardstock as shown above which will give you the Candy Corn look!
Of course, you have to fill it with sonme Candy Corn before giving it to someone!


Hope you had a good Monday,


Julie


Sunday, October 4, 2009

Wide Oval Pumpkin Tote

Fall is definitely in the air!! It's cool in the morning and the evening, and the evening is getting dark so early now! Seems like it happens so fast. But with the coming of Fall, I always feel excited about the Holidays coming too!


I found a cute little idea surfing some blogs this weekend. I like it because it's so little! It doesn't give a lot of room for treats, but thought it would be part of a cute little place setting idea for the Thanksgiving table (or you could even change up the front for a cute little Halloween treat too!).


Here's a photo of all the parts before I put it together. The pumpkin made from five (ten altogether, for the front and back of the tote) Wide Oval punches from Pumpkin Pie Cardstock. I sponged the edges of each one. The handle is a 1/2" x 6" piece of Pumpkin Pie. The box base is a 2 1/4" x 5 3/4" piece of cardstock. It's scored at 1 3/4", 2 3/4", 4 1/2", and 5 1/2". Than along the bottom it's scored at 1". I stamped a couple leaves from the Autumn Harvest set onto Old Olive cardstock. And I made the stems (one for the front and one for the back) from a scrap of Old Olive.


I hope you're having a great weekend! Thanks for stopping by,


Julie


Thursday, October 1, 2009

Sneak Peek for Friday's Class


This is one of the cards we'll be making tomorrow at the First Friday Technique Class. We will use the Finial Press Embossing Folder with a slim wooden frame underneath it to emboss the texture on the Sage Shadow cardstock piece. A blank frame magically appears in the center! Then it is lightly rubbed direct with a White Craft pad. I think that helps to highlight the raised images. Then we add some layers - Whisper White and Basic Gray. And, of course, stamp the saying in the middle. Love that saying from the All Holidays set!


And, the little accent is a flower from the Pretties Kit with a half pearl center. I made the sage "leaves" from a couple smidges of Sage grosgrain looped around and adhered with a Mini Glue Dot. Without the Mini Glue Dots, this part would have been torturous!!


Hope to see you tomorrow at class!


Thanks for stopping by,


Julie


Monday, September 28, 2009

Ding Dong The Witch is Dead!

... but her hat survives! (Sorry for the blurry picture.) I found this cute little idea surfing some blogs tonight. It was somebodys' last year's idea - how could I have missed it for a whole year?!


So, it's a 3 1/2" circle, cut in half. Then put some Sticky Strip around the half circle rounded edge. Peel and stick that to the edge of a Miniature Reeses peanut butter cup. That makes the cone top part...


Then put a couple Dimensionals on the Peanut butter cup and stick it to a Black Punched Scallop Circle - Tie a Pumpkin Pie Grosgrain ribbon for the brim - and you have a Witches Hat!


Cute, huh?!! I used a scrap piece from the Cast-A-Spell Designer Series Papers for the hat, but you could use anything. By the way, I used the New Circle Scissors Cutter to make my 3 1/2" circle - really starting to like it, especially now that I know how to use it!! You can bet we'll be using it soon in a class!


Hope you had a good Monday,


Julie


Sunday, September 27, 2009

A Cool Target Find!


Today I had a couple quick things to get at Target, and I saw these extra-miniature tin buckets in the dollar section, 2 for $1. That silly dollar section is so tempting - "Oh, it's just a dollar - I'm sure there's something cool I can make out of this!!" So when I got home, I sized up the Halloween rub-ons - and they're a perfect fit! I made a pretty simple little tag to hang from the handle with punches and a Happy Haunting stamped pumpkin. Then I added another rub-on to the tag (I'm determined to use them all up before Halloween!). Of course, some Halloween M&M's in a small cello bag finishes it off just right!


Hope you had a nice weekend! Thanks for stopping by,


Julie

Wednesday, September 23, 2009

Little Boo "on the Halloween Roll!"


Just a quick post tonight, cause I'm in the middle of mass producing Halloween Class parts! Gotta love the Big Shot - otherwise some things would just not be able to be reproduced - or at least not for this years' holidays! Anyway, I'm still on the Halloween roll! I even put out my Halloween decorations at home. It's always a major haul from the attic and back, but I love all the little guys and stuff!


Anyway, while in the midst of all my Halloween class stuff and Halloween stuff at the house, I stamped a quick "Little Boo" in Elegant Eggplant, colored in his little jack-o-lantern and punched him out with a 1 1/4" circle punch. Then I layered that onto a 1 3/8" circle punch in Pumpkin Pie. Then I layered all that onto a "sandwich" of Elegant Eggplant scalloped circle punches and a yummy Peppermint Patty inside!


A super simple little treat to give a friend! And the stamp is a bargain Halloween investment at only $6.95! Little Boo is at the back of the catalog in the Single Stamp section!


Hope to see you Friday for some more Halloween crafting fun!!


Thanks for stopping by,


Julie

Sunday, September 20, 2009

Pumpkin Tote!


I found this cute little idea from a blog, The Queen's Scene. She is the queen for figuring this one out! The tote is made from three Pillow Box Dies from the Big Shot. Then the bottom is held together with three 1" x 4" strips of cardstock stuck from tab to tab. And a 4" circle is set inside the bottom to keep the bottom closed up. The handle is a 1" x 11" strip of Old Olive held on to the sides with black brads. And, the face was created with punches - 1" circles for eyes and pieces of small ovals for the center of the eyes; the mouth is from three small pieces of the corner punch all stuck together. The nose is just a free-handed triangle!


It makes a pretty good-sized tote holder for treats. I used quite a bit of filler in the bottom before putting the cello of candy corns in it. But, it could be a good project when you want to give lots of treats!


Hope you're having a great weekend,


Julie

Thursday, September 17, 2009

A Quick Fancy Favor for Halloween!


I made this quick little Fancy Favor Box with the Big Shot tonight. This seriously took me all of about 5 minutes total to make this. I used the Batty For You set with the 1", 1 3/8" and Scalloped circle punches. I dimensionaled that onto the box front with a strip of Cast a Spell Designer Series Paper around it, dropped in a cello of Candy corn, and Wah-Lah!


I really like working with the new 1 1/4" striped grosgrain ribbon. At first I thought it was a little bulky looking, but now I really like it. It's especially light weight which makes it easy to work with!


I hope you're having a great week! Thanks for stopping by,


Julie

Tuesday, September 15, 2009

My Digital Studio - Lookie What I Did!


Today I decided to try out the New My Digital Studio software. Wow!! I thought stamping was addicting, but I think this may be a whole other addiction! I downloaded the discs, and I actually made a couple simple pages, but this one is a "custom" designed page - I would have never thought I could "custom" design a page right out of the shoot!

Once the software is downloaded, you pretty much just click on things and drag them where you want them. The pre-designed pages are SO super easy! You pick a layout design, click on a picture (which some sort of magic thing in the program finds all the folders and pictures that are on your computer - even ones I didn't know were there - my crazy kids!), and the program actually sizes the picture to fit into the layout (this is amazing to me!). I know that was a long sentence, but the point was that this program made the set up so easy that I actually decided to make a custom page to start!

Anyway, this is a little preview. But I know I'll show you more stuff soon. And, the scoop on all this is that it will be available for purchase on October 1st! So far, I have played a little, saved and emailed some of the creations, but we will have professional print services available when you are able to order the software. So, printing will be all ready to go for your projects when you order in October - even Christmas gifts (or cards, or calendars... there will be so many possibilities!).

Have a great day.

Thanks for stopping by,

Julie

Monday, September 14, 2009

Upcoming Halloween Class!

Hi Stampin' Friends,


Next Friday, September 25th I will be having a Halloween Giftables and Decor Class! So, I wanted to show you what we'll be making at the class. Scroll down through the pictures for details about RSVPing for the class!


We will be making these 5 projects. At the top is a Happy Halloween Doorhanger. Then, across the middle is a M&M Matchbook Treat, a Rub-On Votive Holder, and a Chest of Candy-Filled Drawers. Along the bottom is a BOO Banner.


The Happy Halloween Doorhanger is made from chipboard pieces and Cast-A-Spell Designer Series papers. We'll also use some Chunky Black Glitter to spook up the edges! (Thanks to my Stampin' Friend, Liz for the inspiration on this one!)


The BOO Banner can be easily strung from a mantle or shelf by setting something on top of the Black Grosgrain tails on either end. Again, we'll use lots of chipboard pieces (all cut for you by me!) and Cast-A-Spell Designer Series papers.


Another view of the BOO Banner hanging from a shelf!


For a little Giftable treat, we'll also make this "Chest of Drawers," really made from three Matchbox Dies from the Big Shot (and pre-punched by me!).


Inside the drawers you'll wrap 12 nugget candies in Cast-A-Spell Designer Series papers to coordinate with the box!


Then we'll make a super-fast Votive Candle Holder with a Rub-on from the Spooky Treats Rub-ons, and tie a ribbon around it. The candle is included too!


We'll also make this quick little M&M treat holder from cardstock and Designer Series Papers - an easy to replicate idea that you can use with other treats at home!


More candy included!


So, the class will be next Friday, September 25th, and it is limited to 10 people for each time slot. It will be at 10:00am - 1:30pm, and then again from 6:00pm to 9:30pm. I would like RSVP's by Sunday, September 20th so I can order supplies.


The class fee for all of the projects will be $25. Part of your supplies will be a half a pack of the Cast-A-Spell Designer Series Papers. I will be cutting these to size for your projects (along with all the other cardstocks and materials), but you will receive the Cast-A-Spell "left-overs" shown below for making more quick giftables at home!


I hope you will come by for some Halloween fun and crafting next Friday! Please remember to RSVP by Sunday, September 20th so I will have materials cut and ready for you.

Happy Stamping,


Julie