Wednesday, February 9, 2011

A Cheep Talk Treat!


I Love the little Ice Cream Parlor buttons for Sale-a-bration. So that's where this little project started. I used the Pacific Point blue button and put a Pearl Jewel on it's center. (Love the self-adhesive pearls, and bling!!) Then when I was figuring out a stem to put it on, I remembered the Cheep Talk set had a super cute one. So that's what I used. (And I love the rest of the parts to that set too.)

It's fun to grab a set you haven't used in a while and combine it with something new!


And, of course, I had to put something yummy inside! Not just Hershey's nuggets - but the ones with toffee and almonds!!

To make the little fold-together piece, I just went with the size of what I put inside and measured from there. It is 1 3/4" x 5 1/2". Then I scored in from each end at 2 1/4" to create a 1" center spot for the candy.

Oh, and the Scallop Square is the smaller one from the Scallop Squares Duo for the Big Shot. It's a little bigger than the Scallop Square punch!


Have a great day,

Julie

Monday, February 7, 2011

It's a Valentine's Mojo Monday!


I decided to play along with the Mojo Monday 177 Sketch Challenge today. I definitely needed to get my Valentine Mojo going, so here's what I came up with. It's a real reach from my usual style, but I like it. I love how the Sketch Challenges really push you to break out of your usual routine. I used the Love Impressions Designer Papers and lots of Shimmer Spray (always kinda hard to see in the photos!).


Here's a close-up of the Red Glimmer Heart and the Rhinestone bling. I like the pop of the Glimmer and shine here!


And here's the Happy Valentine's banner. I kinda would have liked a little bolder look with the saying, but this works. I really like the glimmer brad at the base of the banner, and I like making it a little wavy by bending the cardstock a little. It gives that little bit of extra pop of the layer.


I hope you're getting your Valentines all ready to go - less than a week away!


Happy Monday!


Julie

Thursday, February 3, 2011

"Chopped" Petal Cone


I'm so excited about this little version of the Petal Cone die!! It might be a little "disguised" under the big flower boutonniere (yes, I did have to go to dictionary.com for the spelling!) - or is that a corsage? Seriously though, doesn't the Fun Flower look like it should be on your daughter's wrist for Prom? Maybe I got a little carried away...

But, then again, maybe there's a new line of business for us papercrafters! :) OK, here's a little closer look at the flower from the top - not that you couldn't see it in the first picture. But, I did add a little Soft Suede sponging and some Shimmer Spray - sponge and spray makes it so much prettier!!

And, finally here's a side view of the "Chopped" Petal Cone - I absolutely Love this little version. While it's flat, and before assembling the pieces, you chop the bottom parts off and score and fold to make it a flat bottom.

What a great place-setting treat! Hard to see, but I did use Vanilla for the scalloped top (and sponged with Soft Suede) - I really like that part, but better to see in person! And I used the set Clearly for You (Lovin' that set now!).


Thanks for stopping by,


Julie

Wednesday, February 2, 2011

Passionate about Petal Cones!!


Besides making cards, I've always loved making little projects. And since Stampin' Up! started selling the Big Shot, they've made making little projects so easy - and great looking!! So, when the Petal Cone die came out, I HAD to get it. And I've been so excited about all the different ways to use it.

But, before I get carried away - this is one of the projects we'll be making at Technique Class this Friday! It's inspired by a Petal Cone I saw at Leadership. I loved the Fun Flower done in Daffodil Delight - so bright and cheery! And the large Chocolate button makes it look even cuter!


On the top, I tied it closed with Espresso Satin Ribbon, and then I realized that the SAB buttons had a mini Daffodil button in it. So I added an espresso brad to it's center and thought it would look cute on the banner! Oh, and the words are a SAB set, So Happy For You.

And, guess what?... This ISN'T made with Crumb Cake!! I still LOVE my Crumb Cake, but I really ventured out and I used Sahara Sand! Cool, huh?


Thanks for stopping by,

Julie

Monday, January 31, 2011

Can Anyone Get Enough Crumb Cake?


...I guess not me!! I can't stop using Crumb Cake!! I just LOVE it! But, don't worry if you're coming to this Friday's Technique class, it won't all be in Crumb Cake.

Anyway, I was asked by a friend to make a 60th Birthday card. And, since there were no requests or preferences on what to make - I went to my favorites, Baja, Crumb and Soft Suede. I know, sorry to be boring in my color choices, but there's just something comforting and yummy in these colors to me!

I really wanted to use the Simple Numbers Big Shot dies to make the 60! And it made an easy stand-out focal point for the card. And I hadn't used my Top Note die for a while, so I busted it out too!


Then I decided to go for some new stuff, and I used one of the new Ribbon Roses (nice that they're all ready to go, just glue dot 'em on!). But I felt like it needed some "leaves," so I made them with 1/4" Celery grosgrain ribbon. And, I hope you can see in the picture that I Shimmer sprayed the background, the numbers and the banner piece. It's always hard to get the "shimmer" in the photo, but I thought it kinda worked this time.

And I used the "birthday wishes" from the the SAB set, So Happy for You. You can get this set (with 12 stamps) for FREE with a $50 order right now - How Cool is that?!


Finally, on the left side of the card, I added a Bold Ribbon statement with the Striped Grosgrain and a BIG button! To get the scrunchy look with the wider ribbon, it worked better to double-up the Sticky Strip row before scrunching - it just helps it stick down better.


I hope the recipient likes the card, and that all her 60 birthday wishes come true!


Thanks for checking it out,


Julie

Sunday, January 30, 2011

Lovin' Fun Flowers!


I started this card this morning, while I was away for the weekend, and with limited supplies, and then I finished it when I got home today! Really all I added when I got home was the Bling - a girl's gotta have her Bling!!

I decided to play it for the Paper Players Challenge #32 because I had so much fun with the Challenge last week! And the Challenge this week is Anything Goes - how cool is that?!

I used the Fun Flowers Big Shot die with Whisper White. And I used stamps from the Clearly For You set. I also used the new Framed Tulips Embossing Folder for one of the background layers. And the colors are Baja Breeze, Crumb Cake, and Soft Suede.


For the layered "Fun Flower" I used lots dimensionals to pop it out there! After I had stamped and sponged all the pieces, I realized I wanted to "finish" the center of the flower with a brad or button. But, because I wasn't at home with all my goods, I had to work with the stuff I brought (ribbon). So with the Baja Breeze Seam Binding, I knotted and twisted it into a little "bun" and made my center!! It was kind of a lot of work, but I like the end result of it. - Although I won't be giving up brads and buttons quite yet, it was a good substitute with limited supplies!


And one of my favorite parts of the card is the butterflies. I stamped them in Baja, then Crumb Cake and then a little edge into the Soft Suede to create a multi-colored effect! (I got that idea from some of the stamping I've seen from my Artisan Award-winning buddy Liz!) And I like how that technique gives each butterfly a unique look!


Thanks for stopping by,


Julie

Friday, January 28, 2011

Cheating for Valentines!


This is a card I got from my stampin' buddy, Dena! When her swaps came, all made with the set Valentine Defined, I wouldn't have imagined a card like this - and I LOVE it!! I guess that's part of the reason we swap - to get someone else's ideas too! I especially love how she used the Fun Flowers Big Shot die in Cherry Cobbler, but then added sponging and stamping to the different layers. It makes the flower pop out!

And, cool that this card could easily be used for any occasion!


Thanks for stopping by,

Julie

Wednesday, January 26, 2011

Clearly Plain and Simple!


I got this set, Clearly For You, at Leadership. And I must admit, I didn't think it was a set I'd use very much. But, now that I have it, I really like it - it has so many cute little stamps in it (12 images)! And, all the stamps are so easy to layer and create a cool vintage look.

I kept the card very simple - no layer! I mainly focused on the tag.


On the tag part, I used the Decorative Label punch and the Wide Oval punch. My favorite part of it all is how the Smooch Spray sets it all out there!! Oh, and, maybe the bling, and I guess the Victoria Trim - OK, I like it all! It still is simple, but I like it! And the colors are Pear Pizzazz, Perfect Plum, Very Vanilla, and some Soft Suede (ink and sponging).


Thanks for checking it out,

Julie

Tuesday, January 25, 2011

So Happy for You, Sale-A-Bration!


Here's a fun card I made with the new Sale-A-Bration set, So Happy for You. The only stamping is the words, but the set has 10 pieces, 5 word/sayings and 5 little images - and I Love the quirkiness of these letters - so fun!!

I also used the new Fun Flowers Big Shot die, with Baja Breeze, So Saffron and Pear Pizzazz. I added the Dotted Embossing Folder on the base of the card, some Pear Pizzazz Designer Paper, Dotted Scallop Edge Border Punch, Pear Pizzazz Stitched Poly Ribbon and a Bitty Button! So many cool added details...

...Which help to add up the cost of materials, just so you can earn the So Happy for You set for FREE!! Because, right now for every $50 you spend from any Stampin' Up! catalog, you get to choose a Sale-A-Bration choice! And there are LOTS!!

Here's a copy of the catalog of choices, and if you don't already have a copy of your own, email me a message and I'll get you one!

Have fun getting the most for your Stampin' Up! dollar during Sale-A-Bration!


Julie


SAB11_US

Download the Sale a Bration mini catalog

Download the Sale a Bration examples supplies list

Photos of the SAB 2011 extra Catalog Images


Monday, January 24, 2011

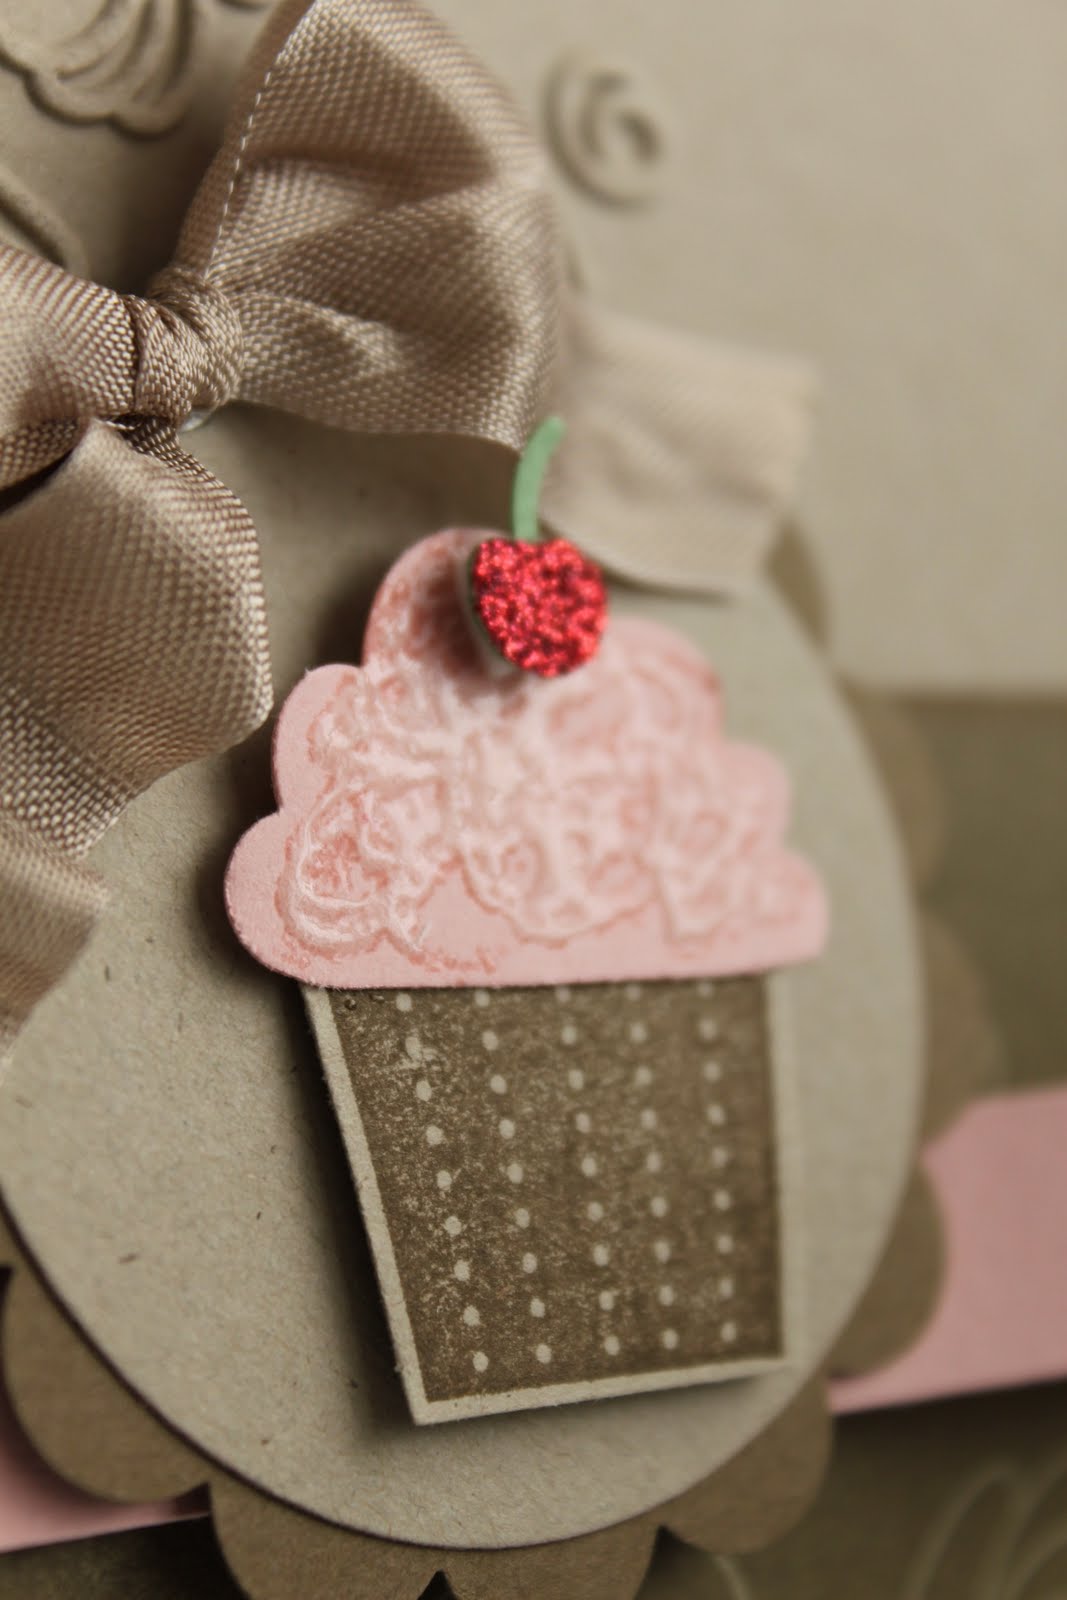
A Cupcake for Mojo Monday!


These Sketch Challenges have really got me motivated again! I find myself really doing my own thing, instead of just looking for good stuff to copy (although that's not always a bad idea either!).

So this card is made with the Create a Cupcake set and punch, and the colors Soft Suede, Blushing Bride and Crumb Cake. I also used a bit of Red Glimmer Paper (perfect for the cherry on top!), a Bitty Button, and a Subtles pink brad.

And the close-up of the cupcake shows the "frosting" technique we've done before! Remember - "green glue" and embossing powder? Although, this time I just used Clear Embossing Powder.

*Edited to Add: To make the frosting, use the Tombow Multipurpose Liquid Glue, aka "green glue" just swirling it around in the area you want frosting. Then cover the glue with embossing powder. I used Clear, but you could use iridescent ice, a mixed color, whatever... Then heat the embossing powder. Kinda fun because it gives a little puffier look than regular embossing.
(This was a technique in a Stampin' Success)

And, here's the Mojo Monday Sketch that I used:


Have a great Monday! Thanks for stopping by,


Julie