Sunday, October 31, 2010

Another Holiday Mini CASE!


Happy Halloween! I know this isn't very Halloween-looking, but I'm getting ready for Christmas already!! I guess being into crafting and card-making I've learned that you always have to be a step, or two, ahead of the game!! So, here I am on the night of Halloween, writing my to-do list for tomorrow - #1 Put Halloween stuff away and take out Thanksgiving/Fall decor, #2 Work on more Christmas Card ideas! Sure! Not like time goes fast enough!!

So, this is a fun CASE from the Holiday Mini Catalog with the Jolly Old Saint Nick set - and the scrumptious Baja Breeze with Crumb Cake - love those colors together!! Do you notice the difference in the button??! It's actually a fake! It's a Sizzix punched out button from card stock - what a cool way to make it a little more "mail-friendly" huh? I think at first glance it looks like a real button - love those Sizzix dies!


Hope you had a fun and safe Halloween,


Julie

Saturday, October 30, 2010

Mini Lunch Sacks are So Cute!


This is the Mini Lunch Sack from the Holiday Mini Catalog. I pretty much cased the idea right from there. I just changed up the little bow that was on the front of it (I didn't want to make 16 loops and connect them to look like a gift bow - too much work!). So, I made my favorite smooshy satin ribbon look just under the edge of the piece of Pear Designer Paper.


Hope you're having a great weekend!


Julie


Friday, October 29, 2010

What a Difference Glitter Makes!


It's still not even Halloween, and I'm working on Christmas stuff! Well, this is for my Stampin' Up! buddies that are setting up a both at the Sacramento Scrapbook Expo. It's Friday and Saturday, Nov. 5th and 6th. I won't be going to it, but my samples will! And this will be one of them.

I'm not usually into the real cutsie kind of style, but sometimes! So, I found this sample somewhere on Stampin' Connection, and I liked the clean layout of it - so I decided to CASE!


And what a difference glitter makes!? It's kind of hard to see in the full card picture, but this is after I glittered the focal piece - much better with glitter!!

He is kind of cute, isn't he?


Julie

Thursday, October 28, 2010

November Technique Class Coming Up!


Next Friday is our First Friday of the Month Technique Class!! So here's what we'll be making. I kinda did a Thanksgiving/Fall and Christmas theme all together!

For our Fall projects, we'll be making a card using the Inset Embossing technique. I love how this works - you'll look at your Embossing Folders and punches in a whole new way!

Then we'll make a 2-in-1 technique with the stamped candles (so super easy!) and the slider box they fit into!


And then we'll jump right into a couple of Christmas Holiday cards! Maybe hard to see in this photo, but we'll make an Any-Color Rhinestone jewel. It's small, but mighty (mighty cute and glitzy that is!) - and it's on the center of the bow on the jingle bell. Better to see in person!

And then we'll make the oh-so-cute Punched Penguin! He's actually a super easy variation of our favorite Owl Punch!! Gotta love how that punch is so versatile!


Hope to see you next Friday! If you want more details about class, email me at julieb30@hotmail.com.


Julie

Wednesday, October 27, 2010

It's going to be a Cute Christmas!


I wasn't so sure about this set Cute Christmas at first. But it really is growing on me! I think the snowman's missing nose was a little odd at first, but now I kinda like him! And the rest of the set (9 pieces altogether) is really awesome! I like that most of the images are little groupings of threes (three ornaments, three gifts, three candy canes, three stockings, three trees), and there is a little to: from: image.

I'm gonna make lots of tags this year with all these cool stamps (and all the awesome punches)- And, YES! Gotta make them before I actually wrap gifts! That would be a great goal!!
And, even better, I might actually post some of them!


If you haven't noticed the Cute Christmas set, you should check it out! It even has cute coordinating Designer Papers to go with it!


Julie


Sunday, October 24, 2010

Stampin' Success Inspired Christmas Card


As a demonstrator, I receive a monthly Stampin' Up! newsletter. When I got my November one the other day in the mail, I was super excited to see a bunch of Christmas card ideas on the cover! So, this card is inspired by one that I saw there. I loved the clean look of it, with all the white layers. I used the set Peaceful Season, which is a hostess only set during the Holiday Mini Catalog period. I actually got the set as a gift at Convention - Sweet, huh??

Also, the little added scallopie things on the bottom edge are from the new Tasteful Trim Big Shot XL die. I wasn't sure I wanted that die at first, thinking it was more for sewing stuff, but I love it for borders on cards - Awesome!

And, yes I did cut out the leaf and berry image! ...with paper snips! :) At class, this is always our "what?? no punch for the image??" So, anyway, it was worth the cutting, cuz I like it! And... I even embossed the saying in silver - haven't embossed a lot lately, but it always gives that added something!

Thanks for stopping by,


Julie

Friday, October 22, 2010

Word Play Christmas!


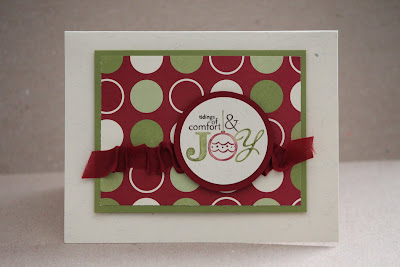
I actually like how this card turned out - simple, but a little somethin' to it! I'm always setting out to copy someone's card and then it turns out different, and my own. I guess that's what I love about the whole process of stamping. - Get a little inspiration, then use it, roll with it and make it yours!!

So anyway, this is the Jolly Holiday paper, with some Cherry Cobbler Seam binding just ruffled along some Sticky Strip. Then the saying comes from the Word Play set. It's punched with the 1 3/4" circle, and layered on a 2" Big Shot circle.

I LOVE simple! And this one fits the bill! Maybe a good candidate for replicating a bunch for Christmas cards to send out this year!


Have a great weekend,


Julie

Thursday, October 21, 2010

Just one more quick Halloween Idea!


I saw these little hand sanitizers that they sell at Bath and Body Works, and I had to jump on the bandwagon! I guess they started selling these at the beginning of September, and they sold out fast. But I did manage to get some. The pictures here don't show how cute their labels are, but they seemed to coordinate really well with out Batty for You set.

So, I saw a few ways that other Stampin' Up! demonstrators were decorating these. But what made me super happy was the one piece fold-over template that Kimberly VanDiepen came up with (no wonder she's Stampin' Up!'s #1 demonstrator this year!).


So with a 2" x 11" piece of cardstock (Yes! You can get 4 from one sheet of cardstock), you score it at 1/2", 1 1/2", 3 1/2", 4 1/2", 7 1/2", and 8 1/2". Then you punch a large oval in the little section between the 1/2" and 1 1/2" section. Then just Sticky Strip the end to the inside. And when you put the hand sanitizer in, you kinda push it through the open bottom side, and up through the oval.

What's super cool is that they make these hand sanitizers in lots of scents and "themes." I saw some different cupcake ones (yum!) and some winter holiday ones coming out soon too! They're so fun to make!


Have a good one,


Julie

Tuesday, October 19, 2010

Perfectly Punched Box #2!


Here's a super-quick and easy way to box up some Christmas treats! The punched image is from the set Perfect Punches. It's all done up in Marina Mist, Crumb Cake and Very Vanilla.

I'm really liking the wide striped grosgrain. At first I thought it was way to "big" for cards and small projects, but you don't even have to use the full width. And, it's so soft and pliable! It even looks cools cut down the middle and frayed on the edges!! I love it combined with the Linen thread too!


Julie

Monday, October 18, 2010

How Many Days till Christmas?!


The last few days I've been thinking and planning Christmas ideas! - Not sure how that just happens... Halloween's not even here yet, and then, Boom! planning for Christmas!

So, here's a simple but elegant style card that would be easy to make a bunch! It's made with new stuff from the Holiday Mini, the set Seasonal Sentiments and the new Big Shot die Northern Frost (for the snowflake).


Only 68 more days till Christmas...


Julie


Thursday, October 14, 2010

Scallop Square Duo Treat Pocket!


Here's a quick little pocket to make from two Scallop Squares! The Big Shot Die is a new one from the Holiday Mini, called Scallop Square Duo. It has a 3" scallop square and an almost 1 3/4" scallop square. The pocket here is made with the 3" scallop square. Then I just folded down part and glued three edges to create a little pocket. I suppose you could make teeny tiny one with the smaller scallop square, or you could use the full-size scallop square die and make an even bigger one. Kinda fun!


Julie

Tuesday, October 12, 2010

19 stamps for $8.50!?!


Today I destroyed my Jolly Jingles Wheel! But, now I have 19 new single stamps!! How cool is that??

So I made this (kinda) quick video to show how to do it.


The only other hint I would add to the video is that you really need to use your hobby knife to get in between those close words/images!

And, I'm not usually into destroying things (I couldn't even write in a book for a very long time!), but I'm glad I did it! I'm excited to create some cool things with all my "new" stamps!! And all 19 were only $8.50! What else can I destroy :) ?


Julie

Monday, October 11, 2010

A Change of Colors...


I wanted to make a quick card tonight. I had a card like this in my swaps stack from Convention, but it was in Rich Razzleberry. So I decided to copy it, but I wanted to use a color a hadn't used much. So I pulled out Poppy Parade. And then I realized that I don't think I've even used that color at all!!

So... here it is! Pretty simple, but I like it! The set is Circle Circus, and the embossing folder is Finial Press. It might be kinda hard to see, but I punched Finial Press embossed white circle pieces that are randomly stuck on the top half of the card. It gives it great texture! And, of course, it has a coordinating Poppy Parade ribbon.


Julie

Sunday, October 10, 2010

No Tricks, Just Treats Class!


Here's a look at all the fun stuff we'll be making this Friday! I LOVE making little treats to give - and Halloween is the perfect time!! I won't be handing these out for all the trick or treaters in the neighborhood, cause they're usually more about just the candy. But I know I'll be finding some deserving recipients for my special treats!

It's not too late to plan on making some cool Halloween treats! I'm looking forward to making treats with everyone this Friday!


Julie

Thursday, October 7, 2010

Super Quick Thank You!


I was in need of a stack of Thank Yous today and this is what I made! Super quick, not the most embellished (obviously!), but great for mailing!

And, sometimes quick is good! Makes you feel like you've accomplished something in such a short amount of time. Now, I can focus on writing and sending them!


Julie

Wednesday, October 6, 2010

Two Tags Pumpkin!


I found this cute idea from another demonstrator, Libby Fens. I think her original was made from two tags run through the Big Shot with the Two Tags Big Shot die., and then stuck together on the two bottom edges. I've made one like that before, and it was super easy!

But, as I was making one of my own this time, and then thinking of making quite a few more, I realized that I could save some work by folding the card stock in half before running it through the Big Shot.


So I took a piece of pumpkin pie card stock, 3" x 7", and folded in half 3" x 3 1/2". Then I laid it on the die so that the loose ends were just above the rounded edge of the tag shape, and the folded edge is about 1" above the edge of the tag bottom. By doing it this way, I saved a little card stock plus the time of sticking the bottom halves together!

The score lines made by the die still go through and make the bottom (to put some candy onto!). Then the rounded edges still fold up and meet to make the top of the pumpkin's head! I also ran it through the Paper Crimper to give it the pumpkin "lines."

The pumpkin's face was made with the Autumn Harvest stamp!


Julie

Tuesday, October 5, 2010

Two Cool Owls!


I'm finally using the Woodgrain Background stamp!! I bought the stamp with a card like this in mind, but just hadn't made one yet. Now, here it is! I wasn't sure I wanted the owl punch, and then after I got it I knew I needed the Woodgrain background to make this "hole in the tree" kinda card!


Here's the inside - which doesn't leave a lot of room to write, but I like it anyway!


Have a good one,


Julie

Saturday, October 2, 2010

Spring into Fall!!


Here's a really simple card I didn't make! I think I got it from Convention - cause it was in my stack of Convention swaps! The Cherry Cobbler background texture is made with the Perfect Details Texture Plate (hello... can you say 3.95 for two textured backgrounds?!!) And the rest is simple stamping with Awash with Flowers! And Early Espresso card stock! Simple, but great! Just changing the colors turns Spring stamp sets into Fall!


Julie

Friday, October 1, 2010

...And then there were Cupcakes!


With all the cupcake cozies and picks made up, I had to make cupcakes!! I got this cardboard Halloween cupcake stand at the cooking store nearby. I wasn't quite sure I wanted to get a "real" cupcake stand yet, so this was cool for now!


Here's a close up of one of the cupcakes, and I'm really glad I got the Perfect Setting die now! I just love how these dress up the cupcakes - and especially with our coordinating papers, sets, colors - Too Cool!


Have a great weekend!


Julie