Tuesday, February 22, 2011

Layers of Fun Flowers with a Mojo Monday


I made this card today for the Mojo Monday Sketch 179! Here's what the sketch looks like:


I used the Fun Flowers Big Shot die for the flower. And I added a couple 2 3/8" scallop circle punches in between. I also added some texture with Square Lattice Embossing Folder, and some Shimmer Spray and sponging with Soft Suede in here and there spots.


Also, behind the layered-up flower I used the friend Texturz Plate to add another little somethin' somethin' for the background.


And for the ribbon around the card, I used Twill Tape. I gave it a little sponging with Soft Suede too! I think the Soft Suede sponging kind of softens the look of the parts!


Thanks for stopping by,


Julie

Sunday, February 20, 2011

A Happy Birthday that's Sew Suite!


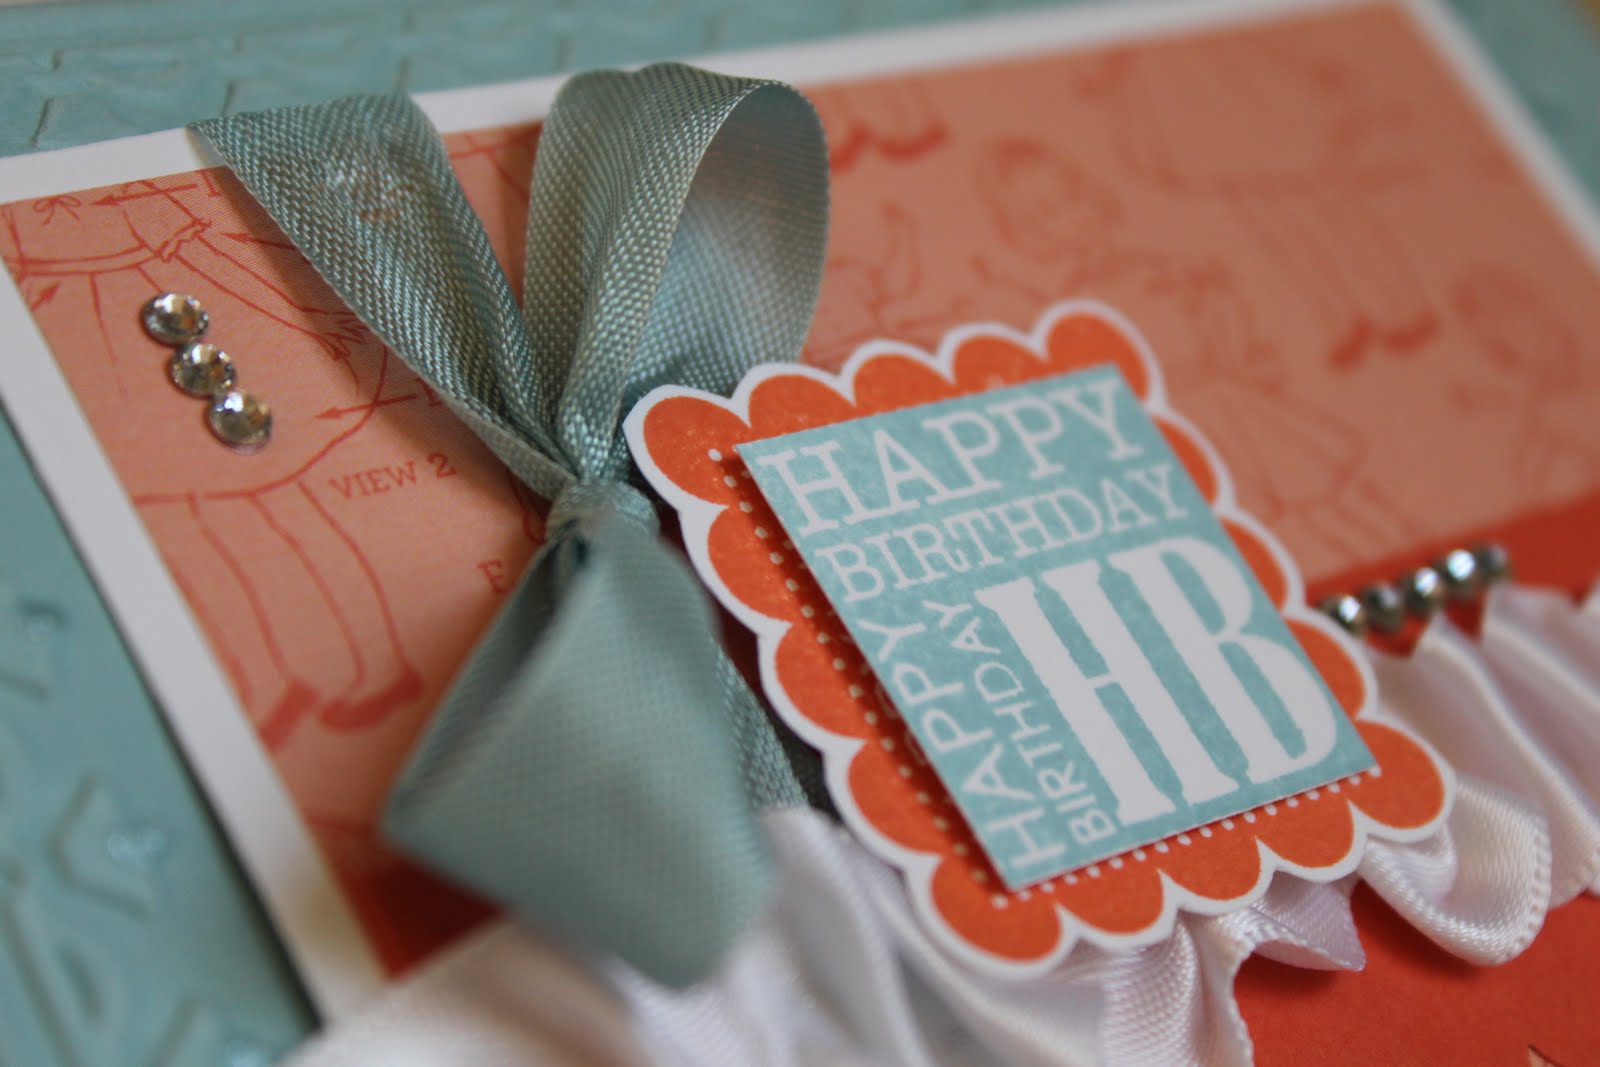
This is a kinda quick card I made today with the Sew Suite Designer Paper and the Punch Bunch Sale-a-bration set. The colors I used are Baja Breeze and Tangerine Tango - kind of a little fun change of color combo!


Here's a little close-up of the Scallop Square Happy Birthday! OK, don't look too close, cause I don't have my Scallop Square Punch with me. I had to cut, - yes, with scissors :) - around the scallop edges!

Then, I like the Happy Birthday square in the Baja layered on top of it. It's the same stamp, just in a new color. And, boy do I hope that Stampin' Up! eventually sells a 1" square! That would make my life happier!


I also added some bling! And the little shimmer on the Tulip Frame edging is the Top Coat Smooch Pearlized Accent Ink - love that stuff, adds just a little here and there!

Hope you're having a great weekend,


Julie


Saturday, February 19, 2011

True Friend Punch Bunch Flower!


Today is one of those great days to be inside making a card! It's rainy and windy outside, got the fireplace going inside... No pressing plans for the day, so why not have some fun creating?

I decided to use the SAB set, Punch Bunch. And I used the Fancy Flower XL punch.


I made the large flower first - I kept seeing the "true friend" being the center of a flower. I used Concord Crush, Pear Pizzazz and So Saffron.


I used the Perfect Polka Dots and Square Lattice folders to give some more texture to the flowers. And, of course, a little Shimmer Spray on some of the different layers too - hope you can see some of that in the pictures!

I had to get a little creative for the So Saffron flower centers. (The Saffron flowers are made from the little Flower Fusion Sizzlets die for the Big Shot. - love those little guys!) I didn't have a punch with me that fit for the center - so I decided to do a little tearing from scraps. I kinda like how they turned out though - something different.


Another thing I didn't have with me was a border punch. So I used my 1" circle punch and did a make-do border sticking together a bunch of them!

Thanks for stopping by,


Julie

Friday, February 18, 2011

Punch Bunch Candy Wrapper!

A super quick post today - just made this quick candy wrapper with the Big Shot. I used Cherry Cobbler, Cajun Craze ad So Saffron to color in the image on the SAB Punch Bunch for you stamp! It's so easy to use - Love it!


Here's a close-up! Added an extra layer Cherry Cobbler scallop for the background - I like the layered look, and of course a bling on it!!


Gotta run, but I'll be back this weekend - big plans to have with some stamping this long weekend,


Julie

Thursday, February 17, 2011

Playing with Pals Paper Arts!


I decided to play along with the Pals Paper Arts Challenge this morning! I've had this "yo-yo" fabric circle thingy sitting on my desk since I got back from Leadership in January. - That's where I first saw it, and learned how to make it. So when I saw this sketch, I figured I could finally put the yo-yo to good use.

And here it is...


The fabric was part of a gift I got from Leadership, so I've been using it for little random things, and I love how it has the Designer Paper to match! The yo-yo is made by cutting a circle (easy with the Big Shot!), and then making stitches around the edge and cinching it up into a little puffy circle, or yo-yo! Fun!


Then I just layered it on a Marina Mist circle and a Rose Red Scallop circle, and of course, added a little linen thread to a button center - wahlah!!

One of my favorite things on the card is the embossed background. I like it because I had already put down the flowered piece of Designer Paper, and I realized that the Marina half needed a little something. So when I decided on the lattice folder texture, I figured why not do the whole card front? And I love how the texture looks over the Designer Paper too! Double cool!

And the saying, one of my new favorites, is from the new Bold Blossom set.


Thanks for stopping by,


Julie

Wednesday, February 16, 2011

To Be or Not to Be...


That is the question...

Ever since I saw the little double milk carton crate that was made by Becky Roberts, I've been dying to make one! - Her tutorial was super easy to follow. But then I had to decide what to put on it, and what colors to use. My biggest challenge is always to use something other than my favorites (Crumb Cake and Baja!).


So anyway, I went with Regal Rose, So Saffron and Soft Suede for the colors. And I decided to use the Clearly for You set - Luuvv it!! :)

But then.... I wanted to use the Paper Daisies. So I went to town on the daisies - Smooch Pearlized Paint, textured and sponged the centers, added an antique brad. So, I love how they came out... until... I added them to the milk cartons!

I think they either look like fried eggs, or big ol' buggy eyes!! Hmmm...


So then, maybe they look better with no flowers?? Still dunno?? Maybe a cute little tag? Probably a work in progress for now...


But I do like how the little medallion thingy came out for the base of the crate! I love these little birdies! And yes, that little paper daisy is what started the whole fried egg thing?!?!?.....

OK, so just give in to one of those kinda days!


To be continued..... (and possibly finished, or decided upon...)


Julie


PS - Hey, maybe some Crumb Cake Milk Cartons would solve it?! :)

Tuesday, February 15, 2011

Mojo Monday on a Tuesday!


Boy, oh boy... today was a Tuesday that felt like a Monday! So I decided to take on the Mojo Monday Challenge! That'll make it a good Tuesday (or like a good Monday!?)!!

So I decided to use the very cool Sale-a-bration set, Sweet Summer, and "do it up!" I started out by stamping the flowers and stems, and coloring them in Pink Pirouette, Rose Red, and Pear Pizzazz (soothing...).


Then I added a Crumb Cake, with a Polka Dot Embossing Folder Background, card base. Aaahhh... even more soothing! But then, of course, a little Smooch Spray and Espresso sponging...


And a great saying ("for you" from Say it Simply - and yes, it's a two piece set for $7.95 - YESSSS!!)... a little Espresso Taffeta, and a highlight here and there with Smooch Pearlized Accent Ink...

And it will all be good again!


And here's the sketch that helped me get it all started! You can go here to see other cards made with the same sketch.


Hope you had a good Tuesday!


Thanks for stopping by,


Julie

Monday, February 14, 2011

Valentines in the Mail!


I made a few Valentines that I needed to put in the mail - and man, I felt like I had to really hold back!! I felt like I couldn't put much bling or much of the "good stuff" on them. Either you add all the good stuff, and then wait in line at the post office, pay extra postage and hope that it all stays in place and doesn't get wrecked in the mail. Otherwise, suck it up and just keep 'em simple!


Used up some of the Love Impressions paper!


At least used some Glimmer Paper to spruce up a couple of them!


And a simplified version of the one I made for my husband!


Hope you have a great Valentine's Day!


Julie

Sunday, February 13, 2011

An Elegant Anniversary!


My husband and I were invited to an anniversary party for some of our super good friends who have been married for 25 years!! So I CASE'd this card from Stampin' Connection (Thanks Sandy Alexander!), except the original was made in gold and had 50 on it. I Love the Elegant look to it!

I just took one quick picture of it before leaving for the party! I was really happy with how it came out though! I even used my heat tool and embossed the greeting and the hearts!! And, of course, Shimmer Sprayed the background!

It was also kinda cool that I used the Always set - hadn't pulled that one out in a while, but I still love it!


Thanks for stopping by,


Julie

Friday, February 11, 2011

Valentine with Lots of Texture!


I made this card for my husband for Valentine's Day. Once I got going on making it, I couldn't stop adding texture!!

One thing I really liked using was the Lots of Love Letterpress Plate. At first I didn't really like using it - I think because I thought you had to use the Craft Ink and make a big mess. But now that I figured out that you can just run them through like a Texturz Plate - get the impression, and sponge it to pop the image - I really like it!!


Here's a close-up of the Espresso brads stuck on top of a 1/4" Glimmer Paper circle. I got inspiration from my stampin' buddy Liz, who did that little layering of the circle with the brads - a fun detail!


And here's lots more Glimmer with the heart and Scallop Trim Border. I did lots of Shimmer Spray too!


And I added a Glimmer Brad to the Happy Valentine's Day banner to bring together all the glimmer!


Thanks for stopping by,


Julie