Sunday, March 3, 2024

Creation Station Hop - Sweet Delights and Sugared Dreams!


Welcome to Just Julie B Stampin'! This month at Creation Station we're creating with the theme Sweet Delights and Sugared Dreams. I have a couple of 'sweet' things paired up for this one!!

I started with a Sweet Thoughts Memories & More card base. I love that these cards are a little bit larger than our typical 4 1/4" x 5 1/2" size, it is 4 1/4" x 6 1/4". That 3/4" extra in card height was perfect for this awesomely large ice cream cone! And I love that the Memories & More cards come with a coordinating envelope!  

This 'sweet' ice cream cone was made with dies from the Ice Cream Swirl bundle. I love using the Petal Pink Glimmer Paper on top of the Petal Pink Cardstock so the ice cream really sparkles and stands out!


The ice cream is Dimensionaled on a White and Pool Party layer, that has a Stitched with Whimsy accent. I like how those dies give just a fun little detail!

And my latest favorite sentiments come from the Thoughtful Moments Hybrid Embossing Folder! This 'Celebrate' was embossed/die cut from White Cardstock, then I just lightly added Pool Party Blends ink to the raised letters. - So fresh!! And some Lost Lagoon Bordered Ribbon and Rainbow Adhesive-Backed Dots finish off the card.

I hope you enjoyed your stop here, and hope you'll join me in hopping along to see what the awesome Rachel Traudt has created!


Thanks for stopping by,


Julie B


Sunday, February 4, 2024

Creation Station - Sale-A-Brate Friendship!

Welcome to Just Julie B Stampin'! And welcome to the Creation Station Blog hop this month! We are creating friendship ideas with Sale-A-Bration in mind... There are so many awesome choices from Sale-A-Bration this year and... even more were added on February 1st!! So I had so many decisions to make in what to stamp and show you.

I chose a card that I made with my card class friends. I love this card to use for so many occasions - birthday, thank you, get well, Valentine's Day, just because... Or just a friendship card!   


I used the Bright Skies Bundle for the die cuts and sentiment - Love this new bundle!! And the Sunny Days Designer Series Paper from Sale-A-Bration coordinates with the bundle too - so that made my coordination so much easier!

And do you just love those little hearts and flowers gems??! They make me so happy, they're just adorable!! They are shown in our Jan-April Mini Catalog with the Bee Mine Suite of products, but when you open this card, check out fabulously they coordinate with the print inside...


The hearts are the same Petal Pink color and I love how the little white and yellow flowers are all over this designer paper!!

And this Super WOW Fun Fold inside was an idea I saw from another demonstrator, Sue Campfield. Such a WOW, but so very easy to create! You score a 4" x 12" piece at 3", 4", 5", 6", 7", 8" and 9". What a great way to show off these fun papers, and use them up too!

I hope you enjoyed your stop by, and I can't wait to see what Vicki Boucher has in store for us! 


See you soon,

Julie B

Sunday, December 3, 2023

Creation Station Hop - Santa's Workshop!

 
Welcome to Just Julie B Stampin'! Today we're creating and sharing from Santa's Workshop! Well, today, as I post this, I'm visiting my daughter, son in law and two grandsons in Idaho. - And we woke up to the first winter snow! And it was a LOT!! But I was excited that it felt like the perfect day to take pictures, from what feels like Santa's Workshop! So I went outside in the snow and snapped pictures of a few of my latest Christmassy creations!

First up is a simple idea, but so pretty with the beautiful One Horse Open Sleigh Designer Series Paper (DSP). I cut the DSP to 4" x 5 1/4" for a perfect card front layer. Then I die cut the cabin out with a Stitched Square Die and layered it onto a Pool Party Cardstock piece, and set it aside. With the remainder of the large piece of DSP (the part with the square cut out), I ran it through the Snowflake Sky Embossing Folder. Then that was adhered to the card front. And the smaller layered piece was added back over the empty spot!
 

I added a Linen Thread bow, white cardstock strip for the sentiment and some glitter sequins - so simple, but so pretty! And the embossed DSP is my favorite part!  


And a simple strip of DSP added to white cardstock for the inside is the easiest way to finish the inside - not overdone, but use up those scrap pieces!


Another fun thing I made recently was this easy gift tag. I had a bunch of extra envelopes from the Rustic Christmas Countdown Kit (which is an awesome kit by the way!). So I just sealed the envelope and added some fun pieces from the Christmas Classics dies, some circles and a to/from! I Love the neutral feel for this; I know I can use it on many different types of packages!


And this card makes me so happy! The Brushed Gold Cards & Envelopes are such a pretty and classy start to a great card. All I added to it were some more elements from the Rustic Christmas Countdown Kit, a sentiment and some die cuts from the Christmas Classics Bundle, and a bit of gold twine - love the simplicity and elegance of this!

Kind of some random fun things I've made lately, but happy to make some beautiful things that don't have to be super time-consuming as the holidays are approaching so quickly!!

I can't wait to see what's up next from my Stampin' Bestie, Elizabeth Price! I know it will be awesome!!

Thanks for stopping by,

Julie B

Sunday, November 5, 2023

Creation Station - Containers and Vases!


Welcome to Just Julie B Stampin'!! This month we're creating things with containers and vases. So I went a little out of the box to create a vase and add some flowers to it - and I used a fun fold card idea to add it to!

I'm really warming up to the Garden Walk Designer Series Papers - they weren't my favorite at first look! They just felt a little bit too much, like a lot going on for each floral print. But then after working with them, I've grown to really love them! You just need small bits of the bold prints, and use a bit more of the awesomely coordinated subtle prints! So I worked with that on this card too!


I used the bold floral print as a base layer, and then pulled my color palette from there as well. And I used the new Modern Oval Punch, cut in half, for a vase. Then I used the Bough and Petal Park Builder Punches to create the flowers and stems. And the flower centers were die cut with some of the Paper Florist dies. - I Love how these fun flowers filled that cute little vase!!


Here's a look at how the fold kind of pops out! It's a little 'z fold' piece that is adhered to the base layers that creates the fun dimension of this card!


Inside is a small space for your writing - like they say, sometimes less said is better!?! Well, I know that works for me! I spend more time on making the card, and then never know all the right words to put inside! Haha!

I can't wait to see what the fabulous Mikaela Titheridge has in store for us, up next! 


Thanks for stopping by,

Julie B

Sunday, August 6, 2023

Creation Station Blog Hop - Ombre Blending!


Welcome to Just Julie B Stampin'! And welcome to the our hop this month, where we are sharing Ombre Blended creations! I was excited with the theme of Ombre because I created a super fun card last month that I thought was perfect for this post! - Even though it's a little bit of a cheat! ;)


So... my ombre was created by Stampin' Up! in the Bright & Beautiful Designer Series Papers! There are some super great ombre prints in this stack of papers!! - in Lemon Lime Twist, Pretty Peacock (one of my favorite ones!), Misty Moonlight, Bubble Bath, Azure Afternoon, and in this sample - Berry Burst! I Love it when they do the work for us! - If you haven't seen these awesome papers, you need to go check them out!!

But that is where the background paper piece comes from! And the cute flower was made from the Paper Florist Dies. But wait till you see the flowers inside the card (and the super fun star of the show inside too)...


I created this Pop Up Vase for the inside of this card. You can find some versions of it on You Tube. And it's not as hard to create as you think!

There are so many cute flowers you can create with the Paper Florist Dies too!! And they don't go with any stamp set, so they are kind of a 'sleeper' die set! You should go check them out!!


And for my class, since there were so many pieces that had to be die cut from the Paper Florist Dies, I decided to use the Bough Punch to make the leaves a little quicker! They do have beautiful leaves in the Paper Florist Die set, but just quicker to use a punch when you need 4 sets. 

I hope you liked your stop by! And if you can't find any instructions for the Pop Up Vase tutorial leave me a comment and I can send you some more info!

And I can't wait to see what's up next! To check out what Kathy Kartak has created for us next, click here -


See ya soon,

Julie B

Sunday, July 2, 2023

Creation Station Blog Hop! - New Colors!

Welcome to Just Julie B Stampin' and to the Creation Station Blog Hop for the month of July! This month we're creating with One New Core Color, One New In Color and White! I chose Lost Lagoon for the New Core Color, and technically it's a returning color, but still new to the Core Collection! - I Love it's bluish-green and soft coastal feel! And I chose Pebbled Path for the New In Color. - I Love this awesome new neutral!! 

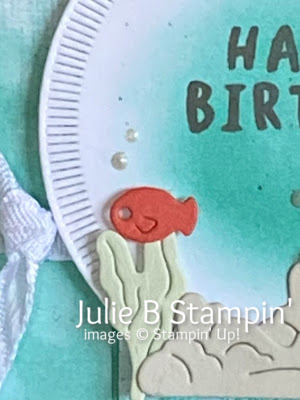
And then I decided to use the Online Exclusives set and coordinating punch, Tropical Leaf. There's just such a nice simplicity to the whole bundle!
 
I also decided to use a new Fun Fold I recently learned. I'm not sure if there's a name for the fold, but it has a Z-Fold vibe, with a bit of a slide action!


Here is the card, completely flat! That is a nice feature, that it folds completely flat so it will fit into an envelope. Easy for mailing!


This top view shows how there is a back piece, and a front piece that are connected with a folded cardstock piece (technically an S-fold, not a Z-fold!). 


And this is an important feature - the front flap does fold back so that you're able to lay it flat to write on the inside! Important stuff - the practicality of it! Not always focusing on just the cute stuff!


Back to my favorite view of the card, just to highlight that I most Love all the Lost Lagoon features - including the ribbon, cut in half down the middle, and the Iridescent Pastel Gems embellishments (which are listed as Balmy Blue - but match almost perfectly with Lost Lagoon, so I felt that was fair game to include them!).

I hope you enjoyed your stop by! And I can't wait to see what the awesome Kathy Kartak has in store for us!


See you soon,

Julie B

Sunday, June 4, 2023

Creation Station Hop - Beach Life!


Welcome to Just Julie B Stampin'! And welcome to the Creation Station Blog Hop for the month of June. This month we've got some Beach Life creations for you! I Love the beach and everything coastal! But the card I made is more like 'headed to the beach!' 


I mostly used the On the Ocean Die Set to create this fairly simple card. I have to admit that I saw this set of dies along with the bundle in the last Mini Catalog and decided that I didn't want it. But then when I saw just the die set in the back section of the new Annual Catalog, I was a little more drawn to it. I like dies that can be stand alone (when you don't have to have the coordinating stamp set). - But yes, I did end up getting the stamp set too (because I know I'll NEED it one day) - Haha!!


I Love that the pieces were very easy - 3 main pieces. I did emboss the sails and trim in between them before adding them to the mast. And maybe you can tell in the picture above, but I glued down the hull, but then added Dimensionals for the mast, flag and the ocean water to set things off a little nicer!  

I just Love, Love, Love the white detail over the Night of Navy waves! I think it really sets off the water and brightens the whole look of the card!

And one other unexpected thing - the background paper I chose was from the Bright & Beautiful 6" x 6" Designer Series Paper pack! Those papers have a lot of versatility in them! I Love how this piece looks like an ocean background.

I hope you enjoyed your stop by, and I can't wait to see what Barb has in store for us next -


See you soon,

Julie B

Sunday, May 7, 2023

Creation Station Blog Hop - Dots and Spots!


Welcome to Just Julie B Stampin'! And welcome to the Creation Station Blog Hop for the month of May! We're creating with Dots and Spots this month!

I used two of the new In Colors - Moody Mauve and Boho Blue for the cards I made. The card layouts are an "Envelope Fold", where the triangular top flap tucks into the top of the 'Thank you' label. - It's a card, but looks like an envelope!


It's a very simple card layout, and so easy to make! You just need a 3 3/4" square piece of Designer Series Paper, scored diagonally. Then adhere half to the backside of a 4" x 5 1/4" card. And then adhere that to a 4 1/4" x 5 1/2" card base.


I used the In Color Designer Series Paper Assortment - I Love the new Dot print! On each card I used the coordinating Textured Ribbon, Jute Trim (Love, Love, Love the Jute Trim!!) and In Color Dots!

For the 'Thank you' Label, I used the "Good Feelings" stamp set and the new Nested Essentials Dies.

I hope you enjoyed your stop by, and hope you Hop On over to see what Sara Nell Langland has created!


See ya soon,


Julie B

Sunday, February 5, 2023

Creation Station Blog Hop - Simple & Sweet!


Welcome to Just Julie B Stampin'! This month at Creation Station we're sharing Simple & Sweet designs! The card I made is one of my favorite layouts to replicate lately. And I think it's become one of my favorites because of the simple, but oh so pretty start to a super cute card. On this card I used the Country Floral Lane suite, plus a few other fun things!

So I started with a 5 1/2" x 5 1/2" Petal Pink Cardstock base. And I scored it at 4 1/4". Then I cut a 5 1/4" x 6" Designer Series Paper piece into 3 parts - 4" x 5 1/4" for the card front, and two 1" x 5 1/4" pieces. One for the front edge and one for the inside trim. - And that makes a fabulous card to just embellish and add some cute things to! (And one of the best part is that you show off both sides of our awesome Designer Series Papers!)

So that's what I did - I added some layers and Country Bouquet Punched parts to the card front, some stamped, some just punched from cardstock. And I added a saying on a quick cut scrap!

But always - the final, but oh so easy, touches are the Iridescent gems and a Linen Thread bow! 


And a "Happy Valentine's Day" inside (plus, just one more little punched heart!) - to finish it off!

I hope you enjoyed your quick stop by, and I can't wait to see what my fabulous Stampin' Bestie, Elizabeth Price, has in store for us -


Thanks for stopping by,

Julie B

Sunday, November 6, 2022

Creation Station - Fun & Fancy Folds!


Welcome to Just Julie B Stampin' and to our Creation Station Blog Hop for November! This month we are showing off Fun & Fancy Folds! I Love this theme - And Love creating a fun fold! And the fun fold I'm sharing with you today is a 'flat fun fold'. Maybe that sounds a little strange, but the folds in this card create double pockets on a card front.


The base of the card is a 4 1/4" x 5 1/2" Mossy Meadow Cardstock piece. and the Boughs of Holly Designer Series Paper is 5 1/4" x 11 3/4", scored at 1 3/4", 4 3/4" and 7 3/4". Then it is just creased into a "W" shape, and adhered down to create the two pockets on either side.
 

The pull out card on the left side was made to be a gift card holder pocket, It measures 4 1/8" x 4 1/4", scored at 1 1/4" for the fold up pocket. 
 

The right side has a simple 3 1/2" x 4 1/4" White Cardstock piece with a 1" x 4 1/4" strip glued to it, just for a little writing space!
 

And then I added a bunch of fun stuff for the front! The holly leaves are from the Holly Berry Dies, and then I added a Wonderful Snowflake on top of those. And the tag was made from the Very Best Trio punch, and stamped with the new Framed and Festive stamp set.


I Love how a few score lines can create some really fun folds that give a whole new vibe to creating a really great card! 


I hope you enjoyed your stop here, and can't wait to see what the fabulous Vicki Boucher has in store for us next! Click the link below to hop on over!

Vicki Boucher

Thanks for stopping by,


Julie B