Wednesday, March 30, 2011

A Last Chance for Bliss...


Tomorrow is the last day to order from Stampin' Up! and get Sale-a-bration benefits... And that means it's your last chance at this awesome set Bliss! I'll admit it wasn't the first set I chose when I got a Sale-a-bration choice, but it ended up being my favorite!!

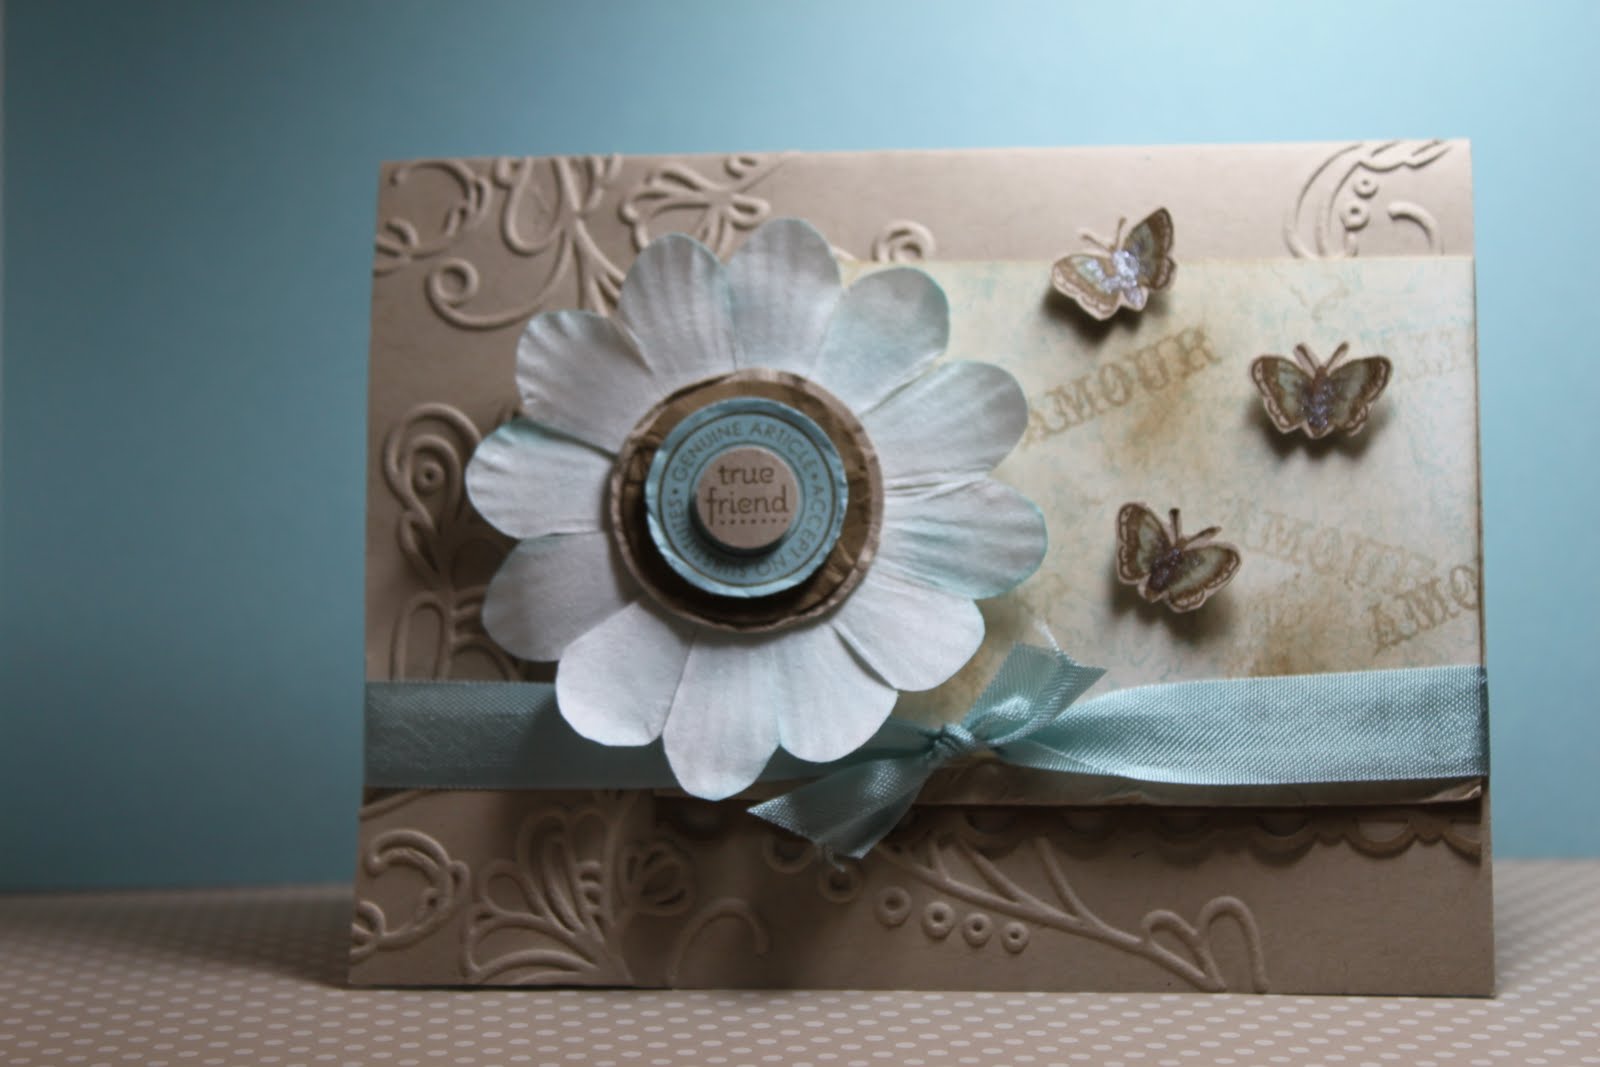
This card was inspired by Julie Williams from Stampin Connection. She made a card like this, and I loved the layout. So I changed the color and added a few of my favorite things to it!!


I changed the color to Blushing Bride. And, of course, I added lots of Rhinestones! - Gotta have that bling! I also Smooch Sprayed and Sponged the piece that I embossed with Elegant Lines folder. (I like that added layer!) - And lots of Dimensionaled Layers!!


And here's the Bliss tag punched out with the Wide Oval punch, and layered on one of the Lots of Tags Big Shot Sizzix dies. I added some sponging around the edges, and also some Smooch Accent Pearl Ink on the letters. - I love that stuff!! It comes in a little bottle that looks like nail polish - and it adds that little something special just like nail polish!


Finally, here's a close-up of the Blushing Bride twill ribbon tied with Linen (another of my favorites!).


I hope you got everything you wanted from the Sale-a-bration brochure this year! If not, what are ya waiting for? I'm sure there are some supplies you need to stock up on. And with a $50 subtotal, you can choose that last-minute must-have set! You can shop online 24-7 - Check out my link on the side bar.


Thanks for stopping by,


Julie

Tuesday, March 29, 2011

Not Lost, but Glad I Found it!


I was putting together a card with the new Paisley Petals Designer Paper (Love it! - And only available for the month of April, until it comes out in the new catalog in July). So, as I was deciding on what color cardstock to layer with it, I thought maybe Sahara Sand, but it was a little off - and then I came across River Rock! It's Perfect!! It might be a little hard to see, but it goes perfectly with the flower centers and little specks in the flower petals. I honestly hadn't opened the package of River Rock since I bought it when our color collections changed - but Glad I did today!


The sun kind of made the photo a little too bright (not that I'm unhappy about the sun being out - and the weather finally getting nicer for Spring!). But if you could see this card in person, the colors are just really striking together! I love these new papers - and the Four Frames set with it too!

If you're coming to class this Friday, you won't just see this card, but you'll get to make one too!


Hope to see you then,


Julie

Monday, March 28, 2011

All Showered Up!


Here's the last of the baby shower projects Jessie and I have been working on! Our first diaper cake! I'd never made one before. It was pretty easy; the biggest decisions were what to decorate it with?! We kept it coordinated with the invitation colors and the lighter colors from the table centerpieces. This will be on a separate table from the bright flower buckets, but it still has some of the same colors.


Jessie wanted to make the baby's name on it - and it fit just perfect draping it down the front. I like the little flower and bling accents on the letters!


And here's a picture of the back of the cake. My mom helped with the bow - it kind of reminds me of how the back of a formal dress would look! And, we decided to use a pre-made silk flower bouquet for the top. I like how it fills the top so evenly all around (and it was quick - buy it and put it in!!). If we would have made coordinating paper flowers, it would have taken a lot of them!!


We had an extra baby bottle (that was what goes in the center of the diaper cake to hold it together). So we filled it with tootsie rolls and decorated it too - just to pass it along as a cute gift to add with the cake!


Thanks for stopping by,


Julie

Saturday, March 26, 2011

Showers of Flowers!


The last couple of days my daughter and I have been working on centerpieces for the shower she's hosting. Honestly, I like doing the little stuff, like the favors. But when it comes to the big stuff, I usually put it off till last. I guess I work better under pressure?! - So since this is the last weekend before her big event, here we are making the big part - the centerpieces!

Even though it's the big part, it is just lots of little things - so that's kind of how we approached it. I started with the colors of cardstock and a few designer papers that went with the theme (and the buckets and pinwheel we got). Then we just punched out a bunch of flowers and started layering. Really, since it was Jessie's project, I did lots of punching out, and she did lots of layering!


I like how the flowers were coming out, and the sizes were fitting good (the buckets were from the Target dollar spot - but they are the $2.50 size, a better larger size for what she needed. But what's with Target, slipping in $2.50 items in the $1 spot these days?! Ha ha!). Anyway, it seemed like lots of flat, and one-sided kind of things for a round-table centerpiece. So, at maybe midnight last night, my creation was to use the clear ornaments and put crinkly paper in them.


Here's a closer up of the crinkly paper ornament balls. I kinda like how they fill the space, with a 3-D effect!


This picture shows another side of some of the other flowers. All together, each bucket has 5 large flowers, 4 littler flowers and 3 ornaments.

And one of the final "filler ideas" for some of the in-between spaces was (my mom's idea) to put some tulle ribbon. I like how it lightly fills in the space and is easy to just smoosh it in where you want it!


Well, off to finish putting them all together!


Thanks for stopping by,


Julie


Thursday, March 24, 2011

Not Just for Babies!


Here's a card I made for the Pals Paper Arts Challenge 86 today. The Challenge was to make something embossed. So I went for Dry Embossing with the Square Lattice folder in the Big Shot. First I stuck the striped paper onto the Crumb Cake piece, and then that onto the Espresso piece. - Then I dry embossed all three layers!

I really like the look of the Square Lattice - kind of gives a quilted feel!


Here you get a little closer look at the dry embossed background, and also the little bunny! I love this little guy, and even though he's from the Nursery Suite Designer Papers (yes, I just cut him out - I didn't even stamp him! But... if you want him as a stamp, even for FREE until the end of March as a Sale-a-bration choice. He's part of the So Cute set!) - he's not just for baby cards! I think he's just a cute little bunny that can be for any occasion! And, especially with Easter coming up, he's perfect!

The little 'friend' tag is the only thing I actually stamped - it's from the Tiny Tags set. Then it's punched out with the Jewelry Tag Punch, and tied with the Linen thread. ...Linen thread and Crumb Cake Cardstock - kind of like the staples of crafting (at least for me!).


Thanks for stopping by,


Julie

Tuesday, March 22, 2011

Melon Mambo Mojo Monday!


I was kind of busy with other stuff yesterday, but I wanted to participate in the Mojo Monday 183 Sketch! So I made it a Mojo Monday Tuesday, if that makes sense?! I decided to go for a Monochromatic look too! - SO, how's that? A Monochromatic Melon Mambo Mojo Monday (on a Tuesday) - quite a mouthful!

I used lots of Sale-a-bration pieces - only a little over a week of Sale-a-bration left!! The flowery/scalloped edge piece is from the Ice Cream Parlor Papers (I really like those now!!); the little Melon Mambo flower is from the ribbon and buttons choice; and the HB stamp is from the Punch Bunch stamp choice.


Here's a closer look from the side of the card. I added a Polka Dotted Textured background, and a few layers with Melon Mambo and Whisper White. The striped Melon Mambo is from the Brights Patterns Designer Series Pack (I really love those too! I find myself going to them a lot for some variation of layers. - And a good deal 40 sheets for $20!).


And for the little focal piece, I actually hand-trimmed the HB square down and added a plain white Scallop square behind it. And for the Scallopy thing behind that, it's just two Fancy Flower Punches. And, of course, the flower button needed a rhinestone bling!


Thanks for stopping by,


Julie

Monday, March 21, 2011

Monogram Madness!


This is one of my favorite projects we made last week! It was so simple, but I love how they came out. The boxes were from Clearbags.com, but you could easily create something from cardstock and Window Sheets. Each box has six cards in it - they are all the same, and envelopes behind them. The cardstock is Confetti White and Baja Breeze.


Here is one of the cards - I used the Elegant Lines folder on the card, just a 3/4" strip of Baja Breeze across it, and the Scallop Circle with the 1 3/8" circle. The Letters are from the Lovely Letters Alphabet. - Super simple!


And here's the tag we made for the boxes - Our awesome new Four Frames Set (available as a special in April only, and then again in the new catalog in July)! All four stamps coordinate with the Decorative Label Punch - too cool!!

I like how these Monogram sets came out - I think they would make a really nice gift!


Julie

PS - Yes, the wide Baja ribbon is retired - even though I wish it weren't!!

Sunday, March 20, 2011

Can You do Me a Favor?


...How about this baby shower favor? My daughter and I made these this weekend for the upcoming shower she's hosting. I Love making little favors, and especially with Hershey's Nuggets. They're so easy to wrap and coordinate with the designs/patterns you're using.

This is the first time I made them as little sleeves. I saw the ones on Becky Roberts blog way back from last November when she made them like this. The little "tray" inside is 2 1/4" x 5 1/2", then scored at 1/2" down each long side. Then you wrap each nugget in a 1" x 3" piece of designer paper (these ones are from the Nursery Suite Specialty pack). The bag it's slipped into is from a craft store, and they're the Wilson's Pretzel bags.


I used the welcome baby stamp from the Punch Bunch Sale-a-bration set for the tag. The punches sure make things easier (especially when you make 40!). And the ribbon was from my retired stash - it's Regal Rose 5/8". But it's the exact match to the papers, so I was glad I had it!!


Thanks for stopping by,


Julie


Friday, March 18, 2011

Ice Cream Parlor Parade!


Here are a few of the projects we made this week with the Ice Cream Parlor Papers! It took me a bit to warm up to the color scheme of the papers, but now I'm kind of liking them!


On Wednesday, we made the mailbox. All I showed was how to use a 4" x 12" piece of Designer Paper to cover it (and a little hole punch trick to cover the flag hinge - Just wrap the paper around the mail box with the flag folded down. Press down on the round screw hinge part. Then remove the paper and punch a 3/4" hole where the hinge impression is on the paper. Then cut from the edge of the paper to the hole. Slide the hole part over the flag hinge, and place the paper around the mailbox. Then stick the paper ends down at the bottom of the mailbox.) And from there, they used their own papers to choose how theirs would look! It was neat to see how they all turned out so different, all with just one pack of paper and accents.

And, on the inside they each got six notecards and envelopes. Then they got to use some of their own papers to decorate those too!


Also, on Wednesday we made the good ol' Nugget Tin! (Click Here to see where I got them) I love these! I had some leftover Melon Mambo ribbon from last year - and it went great with the papers. And for the "For You" flower tag, we used Melon Mambo, and then I chose Peach Parfait and Pear Pizzazz, instead of Pumpkin Pie and Old Olive (I just liked the lighter tones with the boldness of the colors in the papers).


On Thursday, we made a few things. But while the kids were working, I thought they were going to finish early. So I started putting together some of the things I had with the Ice Cream Paper pack. I had enough cardstock with me so that everyone would be able to make a second "For You" flower. And I had the ribbons that coordinated. So, I made a quick "cone" with a 6" x 6" piece of the papers. And, since everyone had a pack of the papers, I figured this would be a good "time filler" project to end the day. But we ended up not doing it that day, they took longer on the other projects than I thought. (I was glad to have the cone already planned for another day though!)

So we ended up making the cone today - and everyone got a bag of caramel corn to put in it too! After a few days of using these papers, I ended up really liking them!


Well, off to put away all my stuff! I'm looking forward to the weekend - It was a super fun week back at school, but it made me remember how I used to really look forward to the weekend - especially the sleeping in on Saturday part! :)


Julie

Wednesday, March 16, 2011

Bright and Bling for a Wednesday!


Boy, oh boy! I think the time change is catching up with me today! It could be a couple late nights of getting stamp class stuff together too though! So, today we made three "bright" and "bling" cards.

These colors are not my usual go-to kinda colors. I do like bright, but I'll usually pair with it something subtle or neutral to mellow things out. I wanted to use the Ice Cream Parlor Papers (from Sale-a-bration), because I wanted to inspire the kids to want to use them too! They each got a package of the papers and accents to use on some other projects for the next couple days. So even though the colors were tough for me, I hope they'll have fun with them!

Anyway, for this top card, I pulled the Pacific Point and Old Olive from the busy background print - and kept it there!! I do like how the Poinsettia flower folder kinda went with the background pattern.


Then this little gem took me a while! All those colored dots kept me jumping! But again I tried to pull out two colors (and a lighter shade of one!) - and stick to it! I really like this saying, Wish Big, that comes from the Word Play set.


And finally this one I used the Sale-a-bration catalog for inspiration. And - once again - I stuck to two colors again. Hmmm, maybe there's something to that?!

Well, off to create and prepare for a couple more days of high school craftin'! Lovin' it!!


Thanks for stopping by,

Julie

Monday, March 14, 2011

Perfectly Punched Simplicity!


Thanks so much for the inspiring card I found from Jen Sannes on Splitcoast today. I was looking for some quick cards, with an awesome pop, to re-create for my high school group this week. Funny thing was I kinda randomly searched on Splitcoast, but I always check out Jen's blog - and don't remember seeing this card - but I definitely loved it!

I did change a couple things, the Crumb Cake card base and the Crumb Cake ribbon (retired Kraft taffeta - which could easily be changed to the current Crumb Cake Seam Binding. I'm using up some of my leftover retired things for the class!).

Anyway, loved the simplicity of this - and of course, my FAV colors, and one of my favorite embossing folders, Elegant Lines! I hope the kids will like this one - I know I do!


Thanks for stopping by,


Julie

Sunday, March 13, 2011

Back to School Time??


I know it seems crazy, but it's back-to-school for me this week! And it's only for a week... and it's stamping with high schoolers! Awesome, huh?! So I've been planning lots of cards, and especially lots of little projects.

This little box is going to be one of the projects we'll be making tomorrow.


And here's a closer look! I'm trying to plan things that they can easily make to give as little gifts. We'll also be making a few cards that can coordinate with the projects too. I hope that they like it, but also that they really use them as gifts!


And here's what's inside - stamped tealights! Pretty easy to do - and hopefully for the first day I kept it all pretty beginner level!? They will have to do some scoring on the Fiskars, and some cutting - if that goes well, I think we'll be in good shape! And we'll see for the cards I have planned!?


Thanks for stopping by,


Julie


Thursday, March 10, 2011

Going Green for Stampin' Royalty!


Today I saw the Challenge that Stampin' Royalty had put up yesterday - Go Green for St. Patrick's Day - and I decided to play! I thought about just submitting my little treat from Tuesday's post, but then I remembered that I wanted to send a St. Patty's card anyway. So I decided to do a take-off from my treat!


So the focal piece here is pretty much the same as what I created the other day. Love the bling to sparkle up the shamrock!


And, of course, then I had to add some more bling to the edge. It was kinda cool that the Polka Dot Embossing Folder made it easy to know just where to place the rhinestones! And I did add some Shimmer Spray to the Polka Dotted Garden Green background piece!


Hope you have a great day,


Julie

Wednesday, March 9, 2011

Bring on the Cake - Bold!


I needed a birthday card, so I decided to go for bold and bright colors with the Celebrations Designer Papers. I love 'em! - Real Red, Pacific Point and Old Olive - lots of pop!! Then I added the Happy Birthday saying from the Bring on the Cake set (from the Occasions Mini).


And here's a close-up of the black brads accents. I kinda put them there to draw the eye away from my "need to go back to kindergarten coloring!" Sheesh, pretty sad that I can't even stay in the lines. I could blame it on my markers that aren't so perfect anymore, but it could just be the operator who needs to do more coloring-in! :) Or I could of done a re-do; but better yet, I think I need to update a few of my markers that are a little squishier on the tips - and then maybe I'll do better!

So, maybe I'll go figure out an order - then I can still get some Sale-a-bration benefits from the order!! :)


Have a good one,


Julie

Tuesday, March 8, 2011

A Bit 'O Green!


I found a few minutes to sneak in a few stamping moments today! My stamp room is completely empty right now, but with new carpet. And, it's getting painted as I type. (And, yes, I know, backwards - new carpet, then new paint?! But that seems like how we do a lot of things! I just hope the drop cloth stays in place and does its job.)

And, then we'll see... it may just be my temporary stamp room until I move things into my son's room (which is the last to get everything done - and a big mess right now!). But at the moment my stamp "room" is spread amongst my upstairs hallway, master bedroom and master bathroom, my son's room, the downstairs office and dining room... and who knows where else??!?!

So I really wanted to make something cool, but there was a bit of hunting for things to get it done! The Lucky Shamrock single stamp was a perfect choice - ONE stamp! For the circle layers, I used a few circle punches (the 1" circle, 1 3/4" circle, 2 3/8" scallop circle) and even the Circles Bigz die for the 2" circle. We really need a 2" circle punch - it fits those layers just right.

I put all those circles on the top edge of the Two Tags Big Shot cut out. And I added a score line about 1/4" down on the flap of the tag to create a little area for some Andes mints to fit inside.


Here it is open so you can see the candies inside. And I just used a little Snail Adhesive to stick the mints down on the back edge.


Here's another close-up with the flap back in place, and you can see the Crumb Cake Seam Binding around it. It just slides under the edge of the scallop circle to make it easy to open and close.

I know I saw someone on Stampin' Connection that put the Andes mints inside this little Tag, but I can't find who it was now!? But the shamrock idea was mine - get get ready for St. Patty's Day!!


Thanks for stopping by,


Julie

Saturday, March 5, 2011

I Couldn't Stand it Any Longer!


Today I spent the day cleaning out closets/rooms so we can get new carpet installed on Monday. (I know, if you've read my blog, yes, I did work on it last weekend too). So really we're getting carpet in four bedrooms, but I planned on getting two at a time done. And, then some sort of spark made me think that I should just go ahead and get three rooms ready! Ugh!! - more work than I had realized it would be!! The first two rooms are extra bedrooms, but the third room is our workout/my stamp room. So I'm kinda motivated to get the stamp room done! I'm even thinking of doing some re-arranging, and maybe making one of the extra rooms be my "stamp only" room! Why not, huh? Who needs two extra bedrooms?

The fourth bedroom will be my 15 year old son's room, which probably hasn't had a good "cleaning out" for about 10 years (and yes, we have lived here for ten years!!) - That room needs paint too; so it will take a lot more work! The stamp room needs priority!

So, anyway... after a Huge load to the Salvation Army (a full truck bed full, and the whole back seat), I couldn't stand it any longer... I was ready for a creative break!!

I had bookmarked the Pals Paper Arts Challenge this week - my absolute favorite colors - Baja Breeze, Soft Suede, and Crumb Cake!! And I also bookmarked the Connie and Mary Sketch Challenge - I love the layout! So I riffled through a few boxed up things and came up with this card!


I used one of the Paper Daisy flowers - and did some Blender Pen with Baja Ink, along with some Shimmer Spray. The center of the flower is the Punch Bunch stamp (love that!). I also added some Top Coat Pearlized Accent Ink on a few spots.


I also stamped and cut out butterflies from the Clearly for You set (also used that for the background part here). The butterflies also got a little Top Coat Pearlized Accent Ink! And gotta love some Baja Breeze Seam Binding!


Hope you're having a great weekend,


Julie

Thursday, March 3, 2011

Shameless CASE for a Good Friend!


Today was my good friend's birthday, and I decided to shamelessly CASE this card I found here. It is definitely card-worthy since it was made by one of Stampin' Up!'s Artisan Award winners for this year, Tessa Wise! And it's definitely for a handmade-card-worthy friend!! I'm hoping I'm posting it late enough that maybe she won't see it tonight, and I'll be giving it to her tomorrow!


I love the brightness of the colors, and it uses two of the stamps from the Sale-a-bration set, Punch Bunch!

The only difference in my card is that I had to add a little bling on the True Friend stamp - a girls' gotta have her bling!


Julie

Wednesday, March 2, 2011

Cupcake Purse?!


I had to make one of these little purse from the cupcake punch. (I'm lovin' how versatile this punch is turning out to be!) Originally I saw Carrie Gaskin make a set of the purses on a card - and I thought they were super cute! Mine uses the oval punches for the handle and flap (I think hers were the 3/4" and 1" circles - but I like a little longer handle so it will go over my shoulder!). And, of course, the purse itself is the cupcake base - upside down!


I used lots of other stuff to add to the card besides the purse! I used Satin Espresso around the card, and (my new favorite thing to do) Cherry Seam Binding scrunched around the 3" circle. I like how you can scrunch that seam binding as little or as much as you want to fit between the layers! The larger Espresso circle is the 3 1/2" circle. Both circles are Big Shot dies offered in the Mini Catalog right now!


And here's a close up of the little saying grouping. Enjoy comes from the You're a Gem set - love those little words (also from the Mini Catalog). I also added an Antique Brad and Espresso button with Linen!

Oh, and the stamp on the purse is from the Clearly for You set - love how that little stamp makes a great accent!

And, yep, there is some Shimmer Spray on a couple areas, but on this cloudy day it was hard to get a good photo of it!


Thanks for stopping by,


Julie